1. Introduction
2. Enable Fulfillment Uploader
3. Place Order And Upload Shipping Label (From Dropshipper Perspective)
4. Fulfill Dropship Order
5. Additional Information
1. Introduction
Dropshipping is a business model in which an online retailer (the dropshipper) sells products to customers without physically stocking the items. Instead of keeping inventories, the dropshipper partners with a supplier or wholesaler who handles the products’ storage, packaging, and shipping directly to the customers on behalf of the dropshipper.
And if you wish to become a supplier or wholesaler who provided dropship service, you will have to establish a streamlined process for dropshippers to place orders with you. Using SiteGiant Dropship Fulfillment, your dropshippers can submit orders, upload or retrieve shipping labels and track the orders easily.
This feature is only available in SiteGiant Premium Plan and above.
2. Enable Fulfillment Uploader
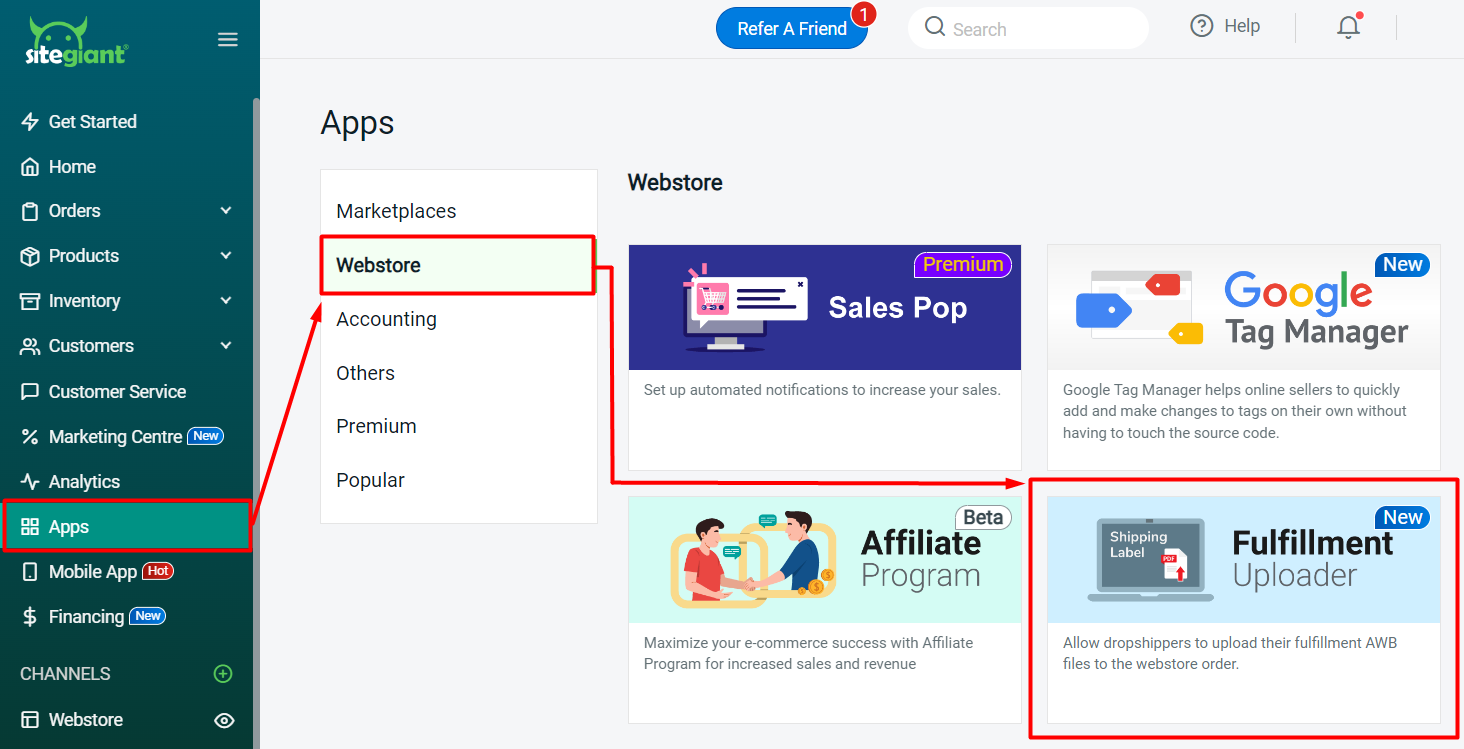
Step 1: Navigate to Apps > Webstore > Fulfillment Uploader.
Step 2: Configure the Uploader Display Settings and Customer Groups > Save.
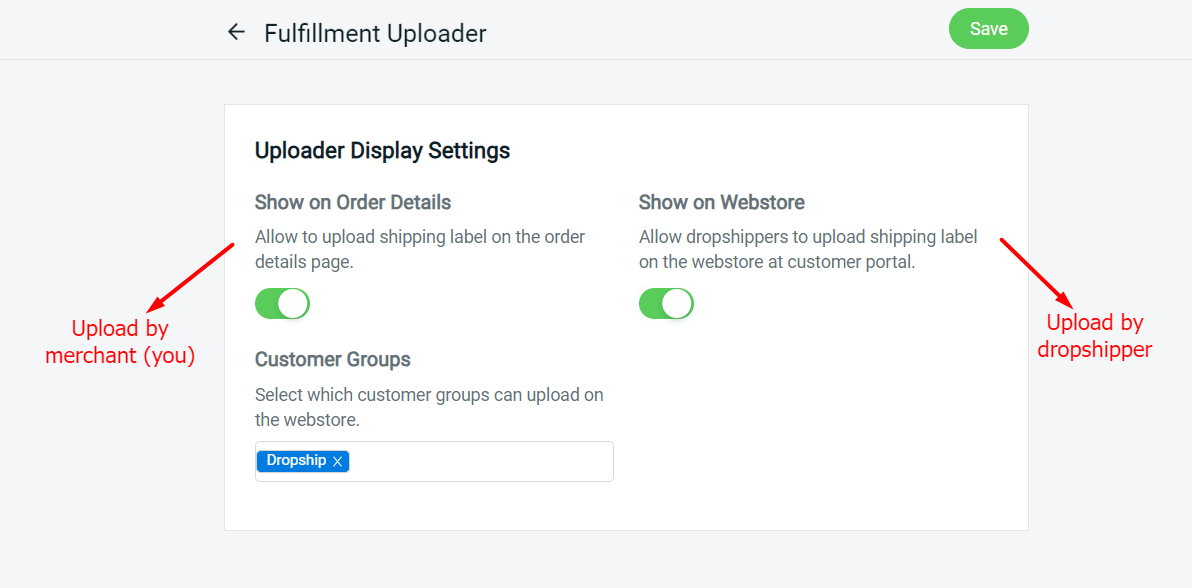
?Note: If the Customer Groups is left empty, it means every customer from any customer group is able to upload the shipping label on the webstore.
3. Place Order And Upload Shipping Label (From Dropshipper Perspective)
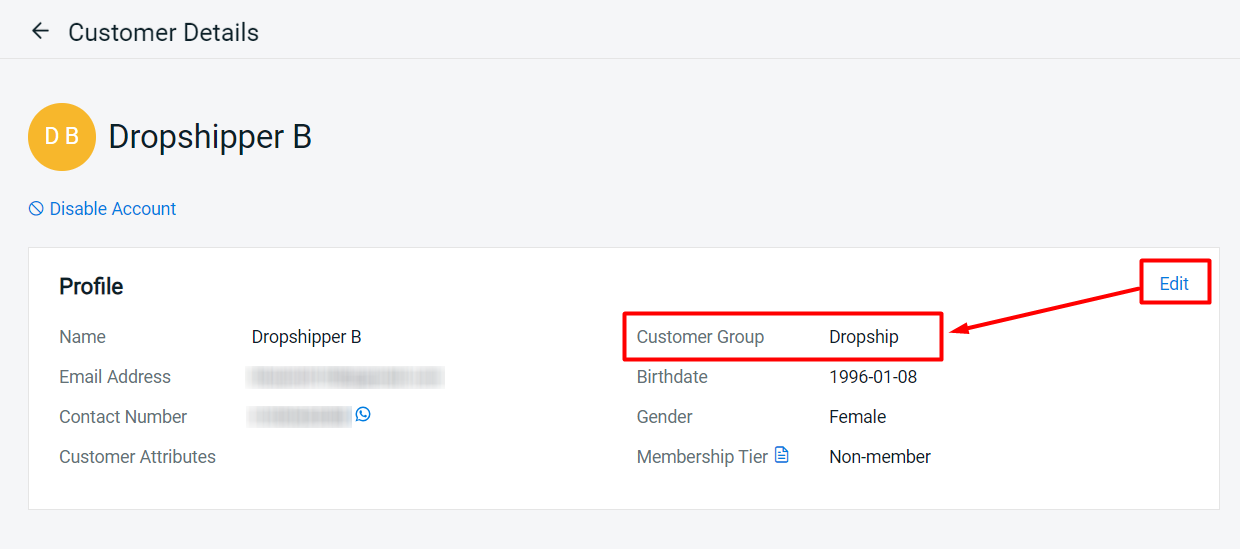
Step 1: The dropshippers will need to create an account on your webstore and be assigned to the related customer group by the merchant.
Step 2: Proceed to place an order and make payment.
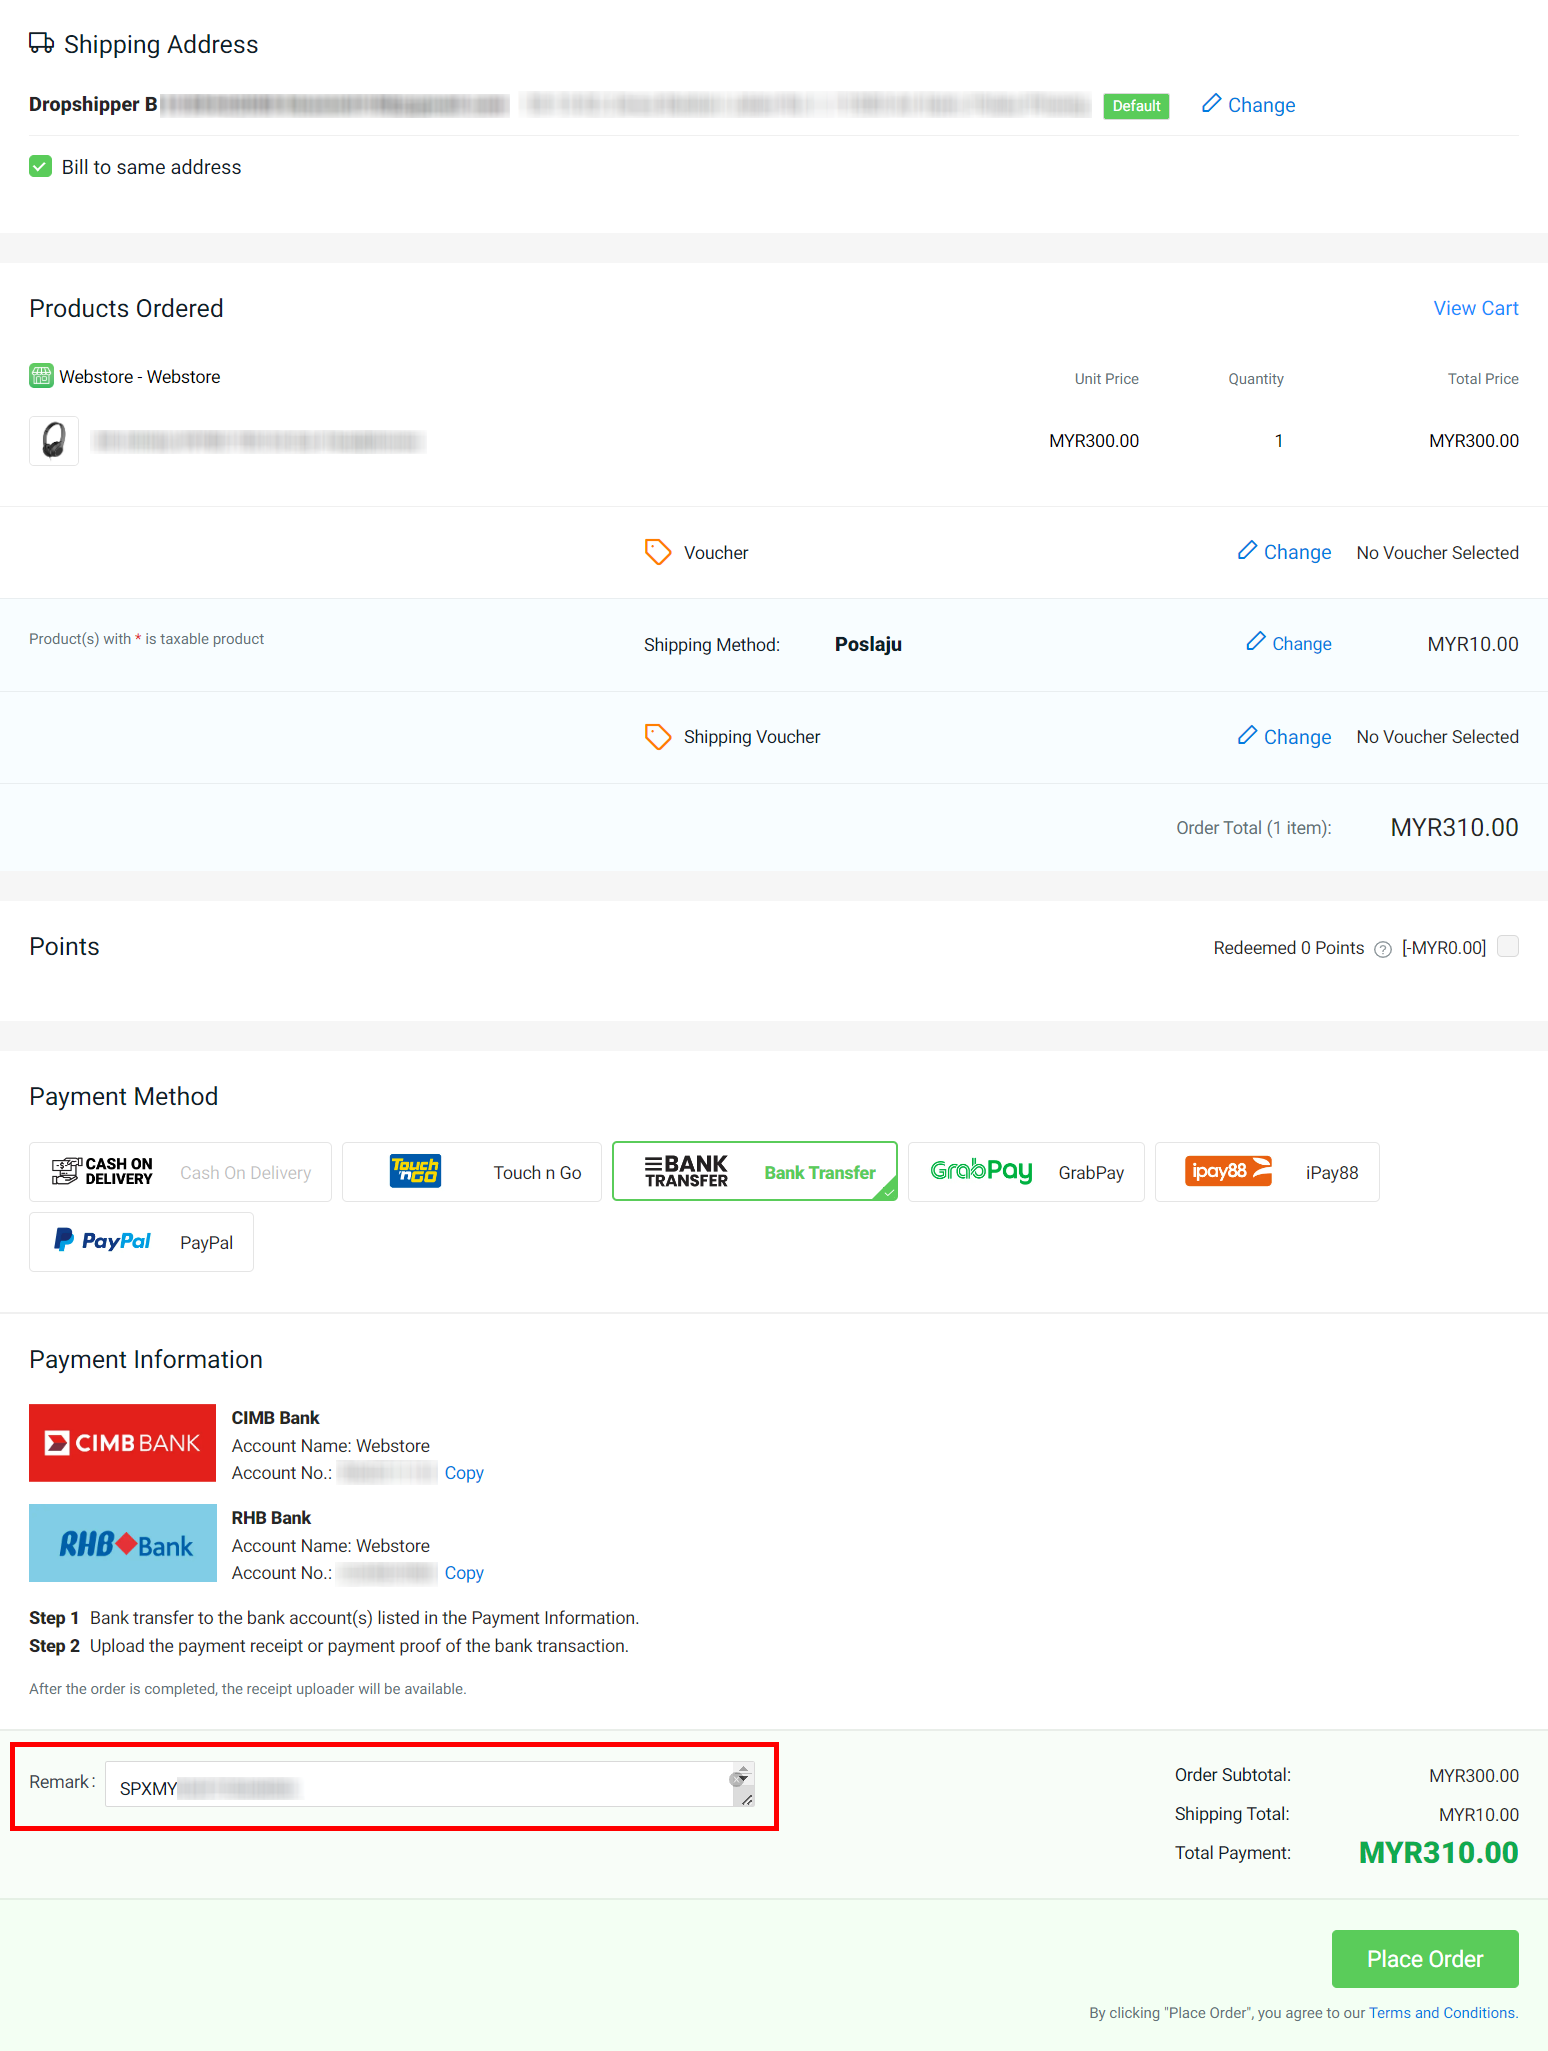
?Note: You are encouraged to add the tracking number from your shipping label in the Remark column.
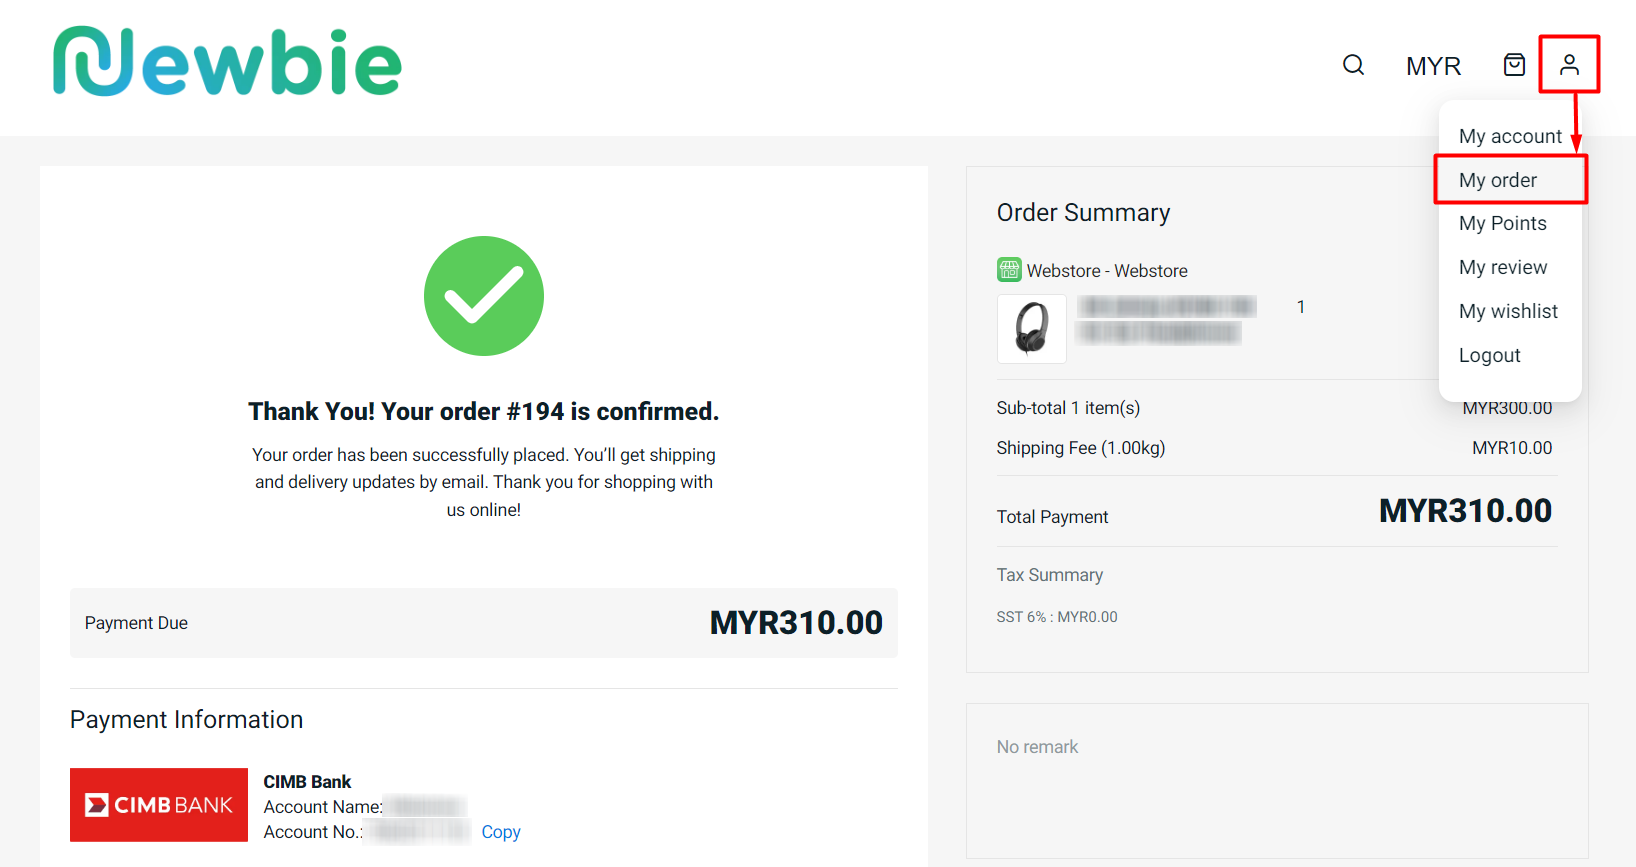
Step 3: Once the order is placed, navigate to Profile > My Order.
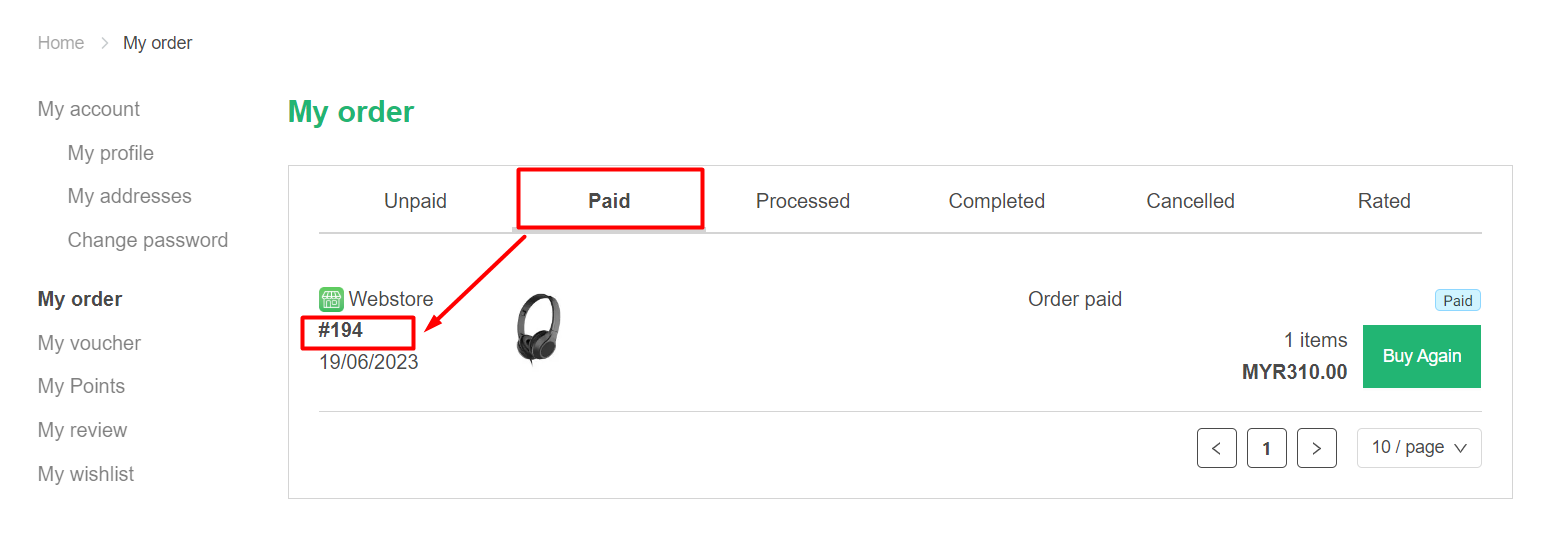
Step 4: Navigate to Paid tab > click on the Order ID to view the order details.
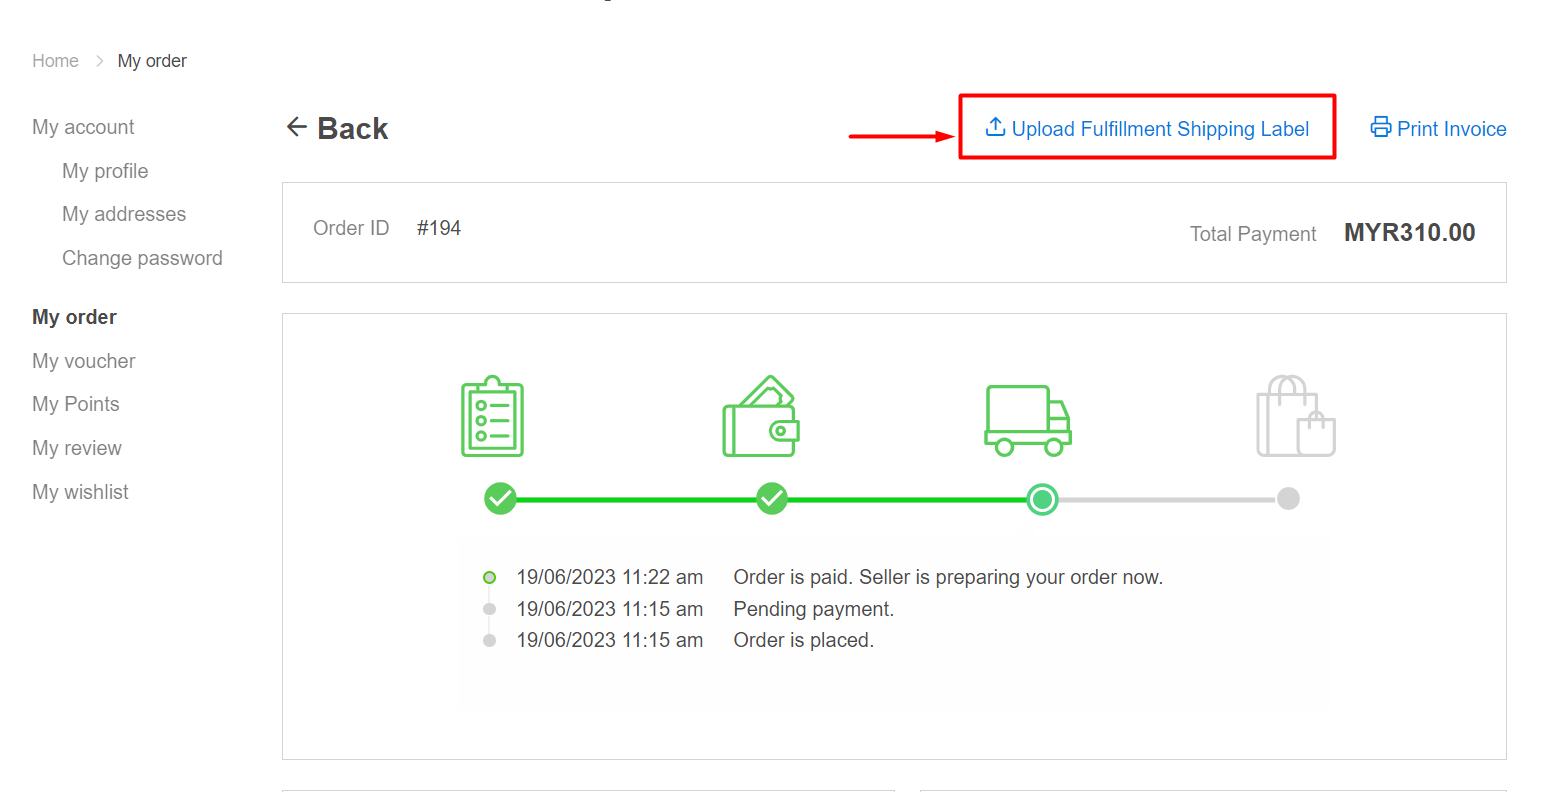
Step 5: If you enabled Show On Webstore at Uploader Display Settings, the dropshipper will find this Upload Fulfillment Shipping Label on the top right.
Step 6: Upload the fulfillment shipping label > Submit.
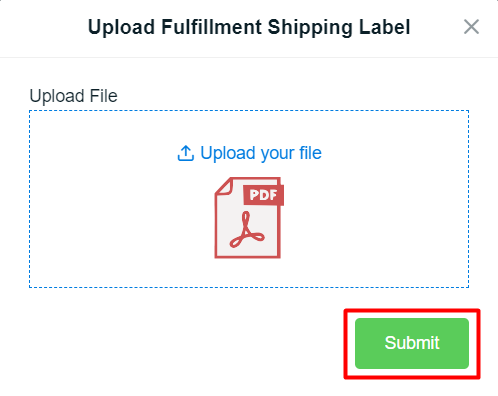
?Note: Only PDF file is supported.
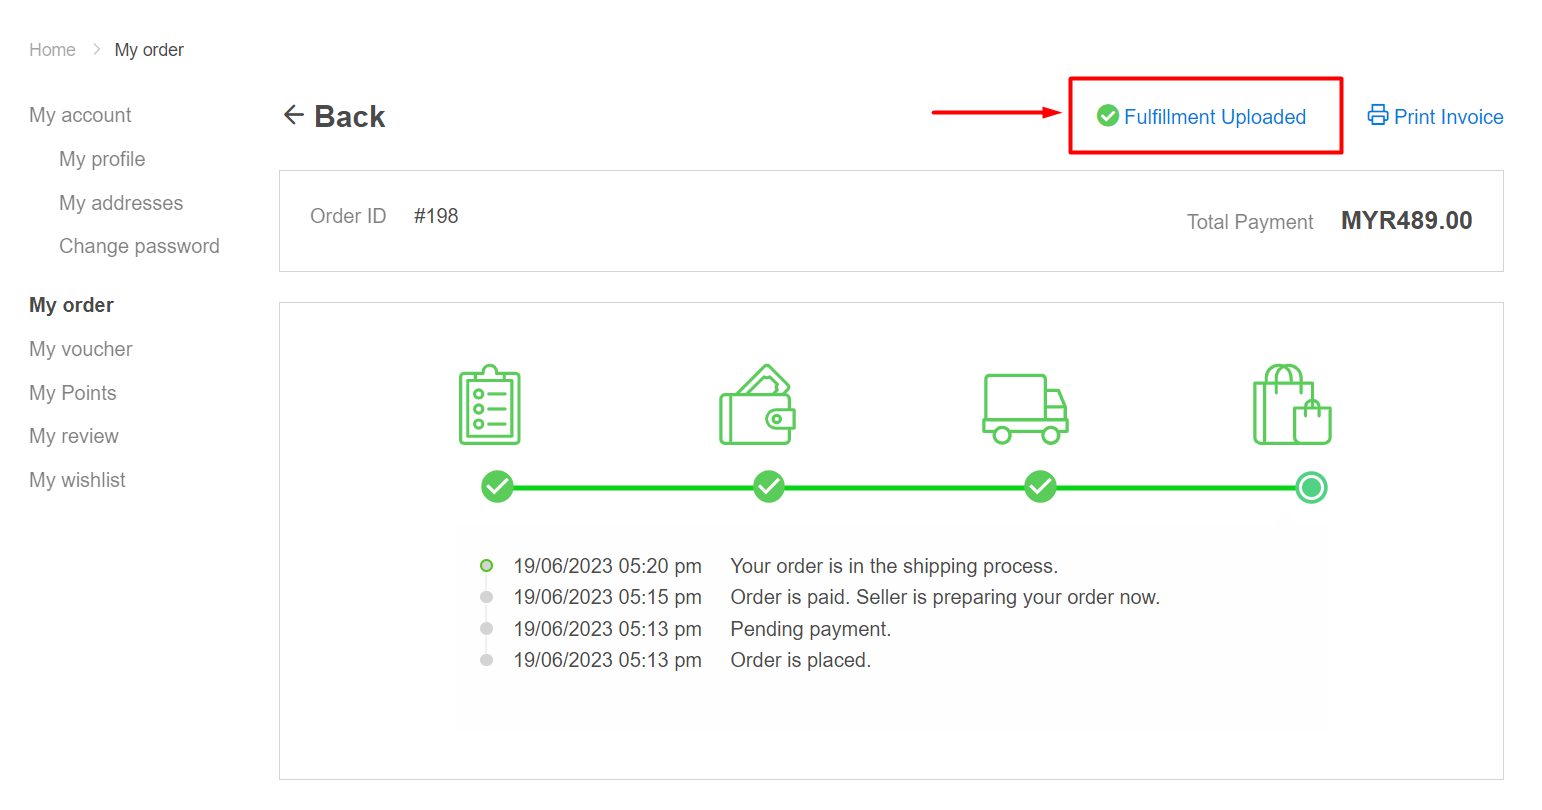
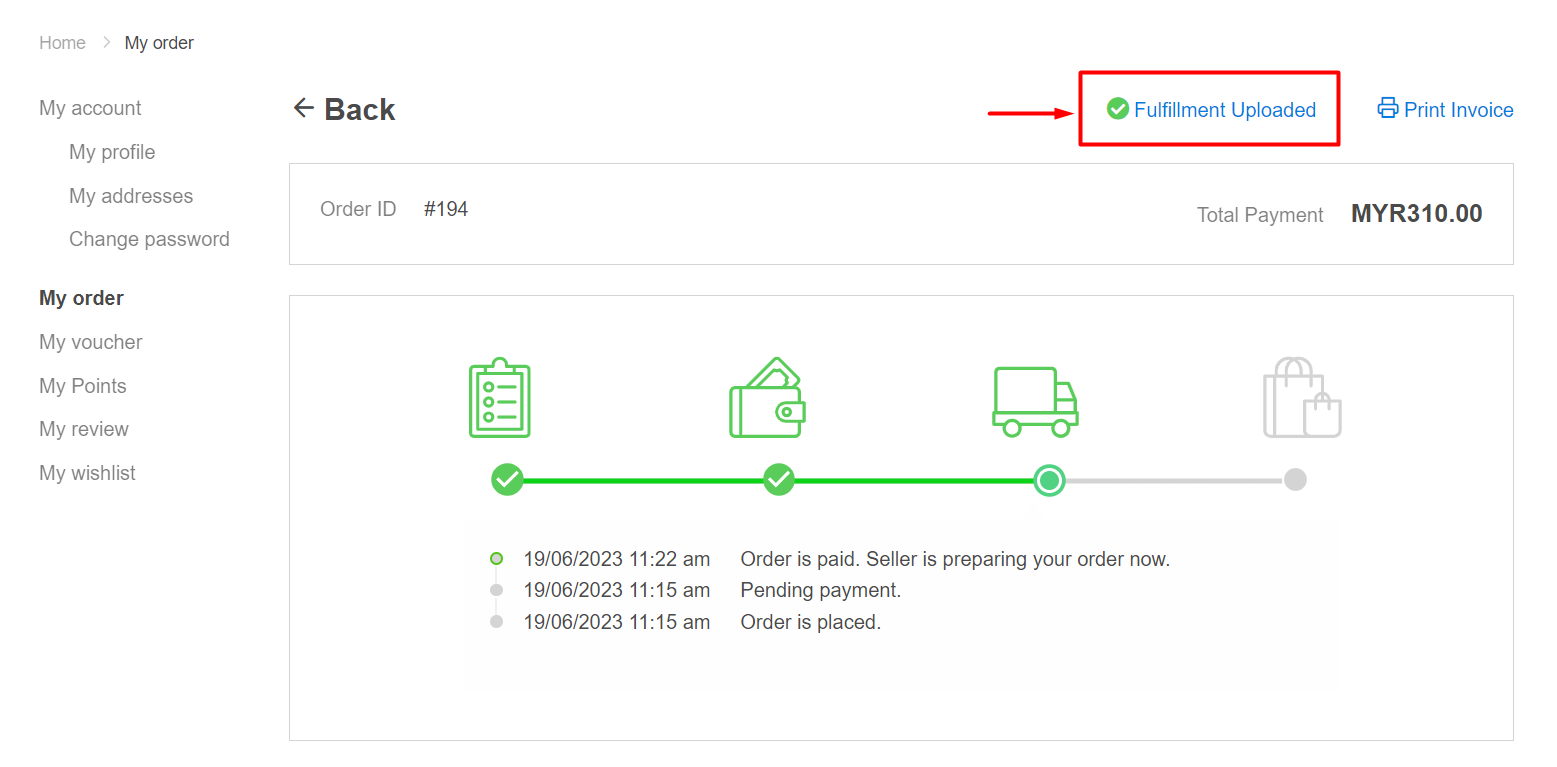
Step 7: Once the shipping label is uploaded, it will indicate that Fulfillment Uploaded.
4. Fulfill Dropship Order
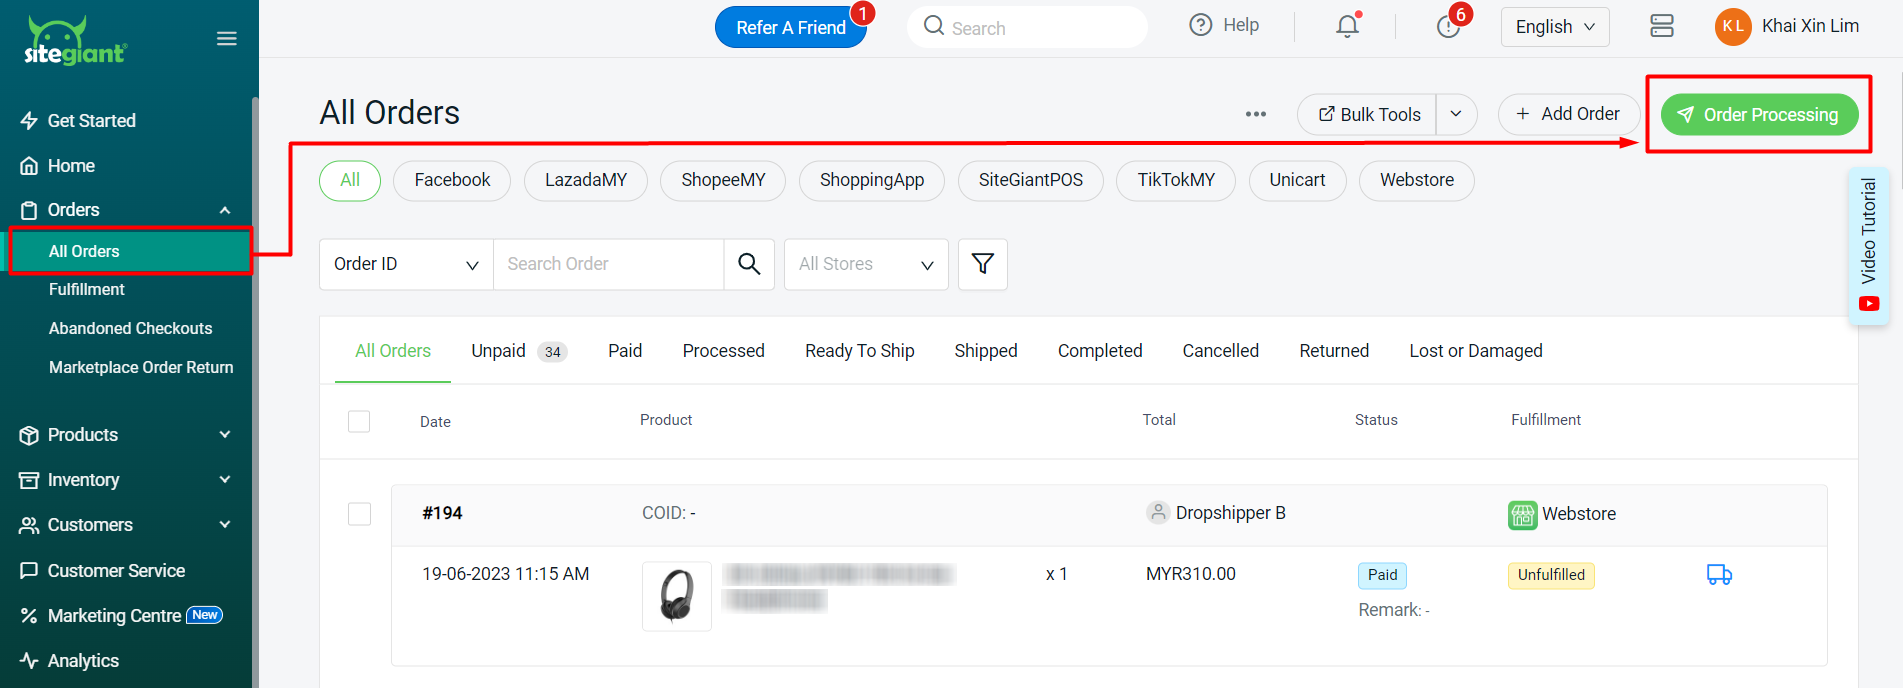
Step 1: Navigate to Orders > All Orders > Order Processing.
Step 2: Click on More (…) > Shipping Label Settings.

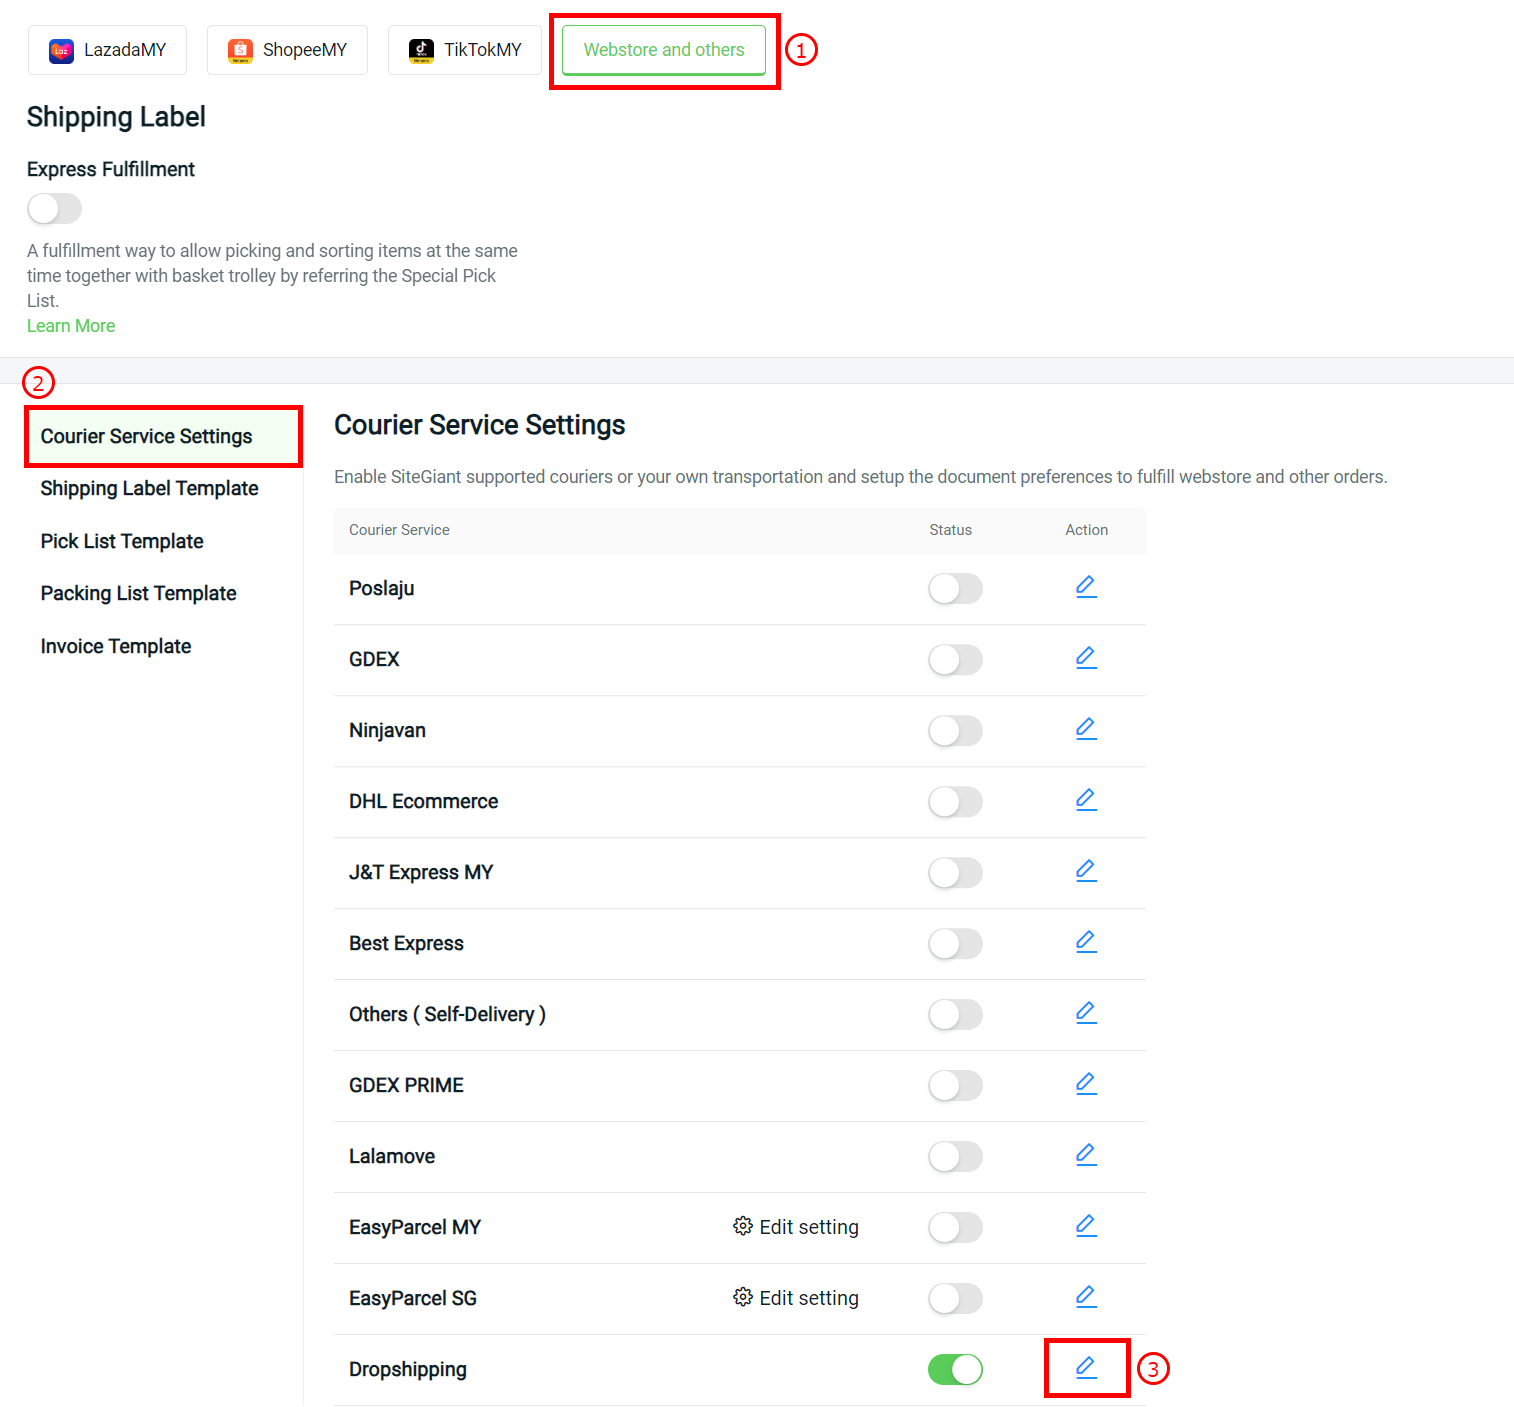
Step 3: Select Webstore and others tab > Courier Service Settings > click on the edit button on Dropshipping to configure the settings.
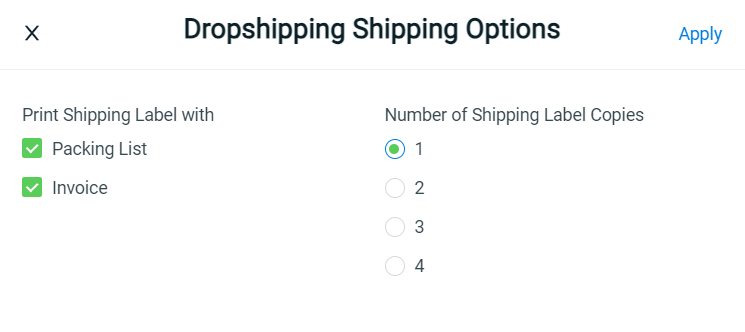
Step 4: Choose if you wish to print the shipping label with Packing List, Invoice, or both > select the Number of Shipping Label Copies > Apply.
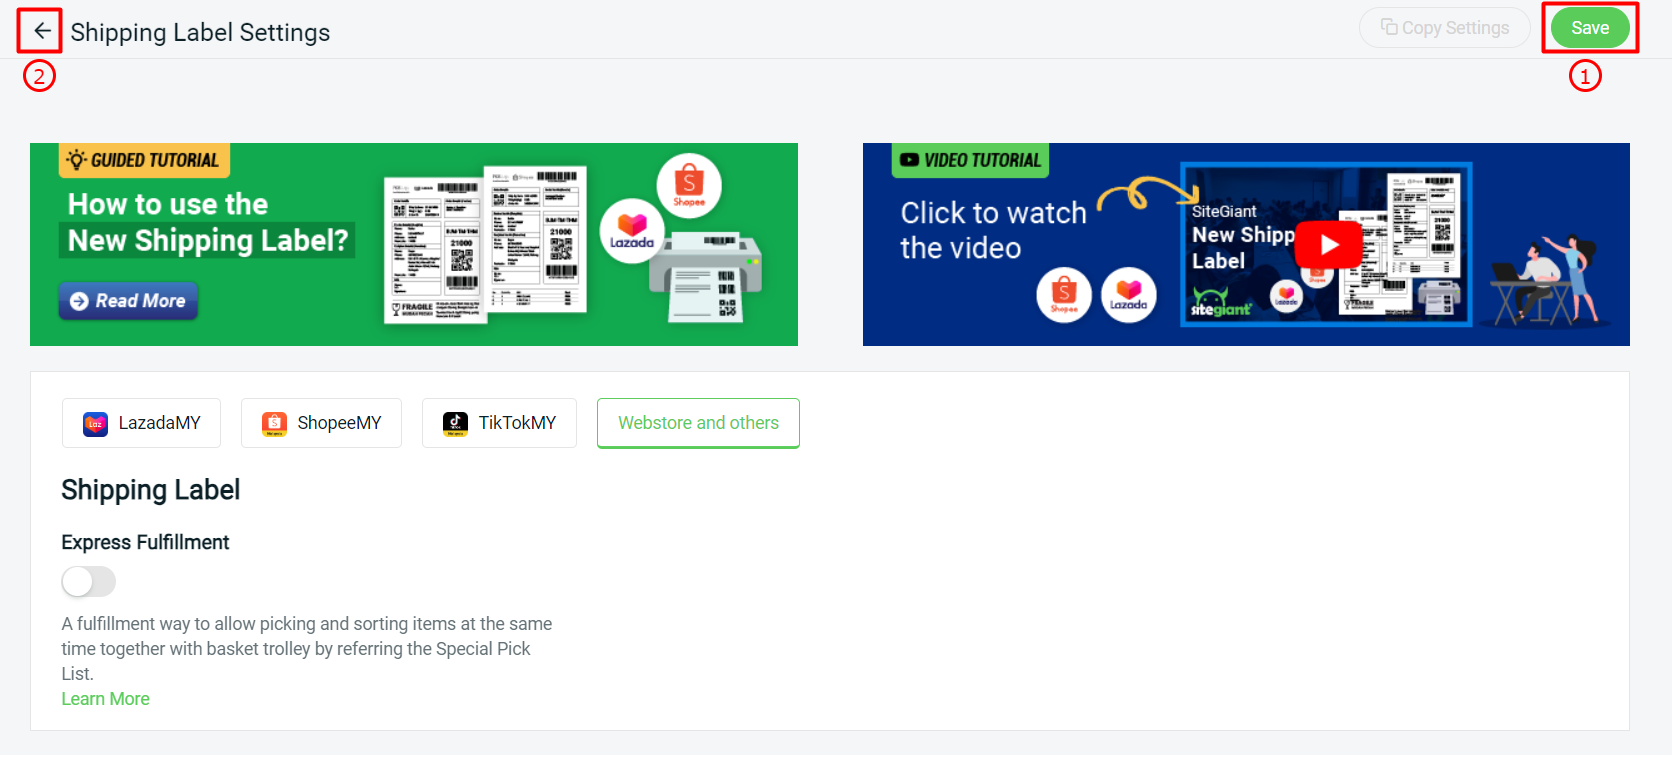
Step 5: Once done, click on the Save button on the top right and back to the Order Processing page.
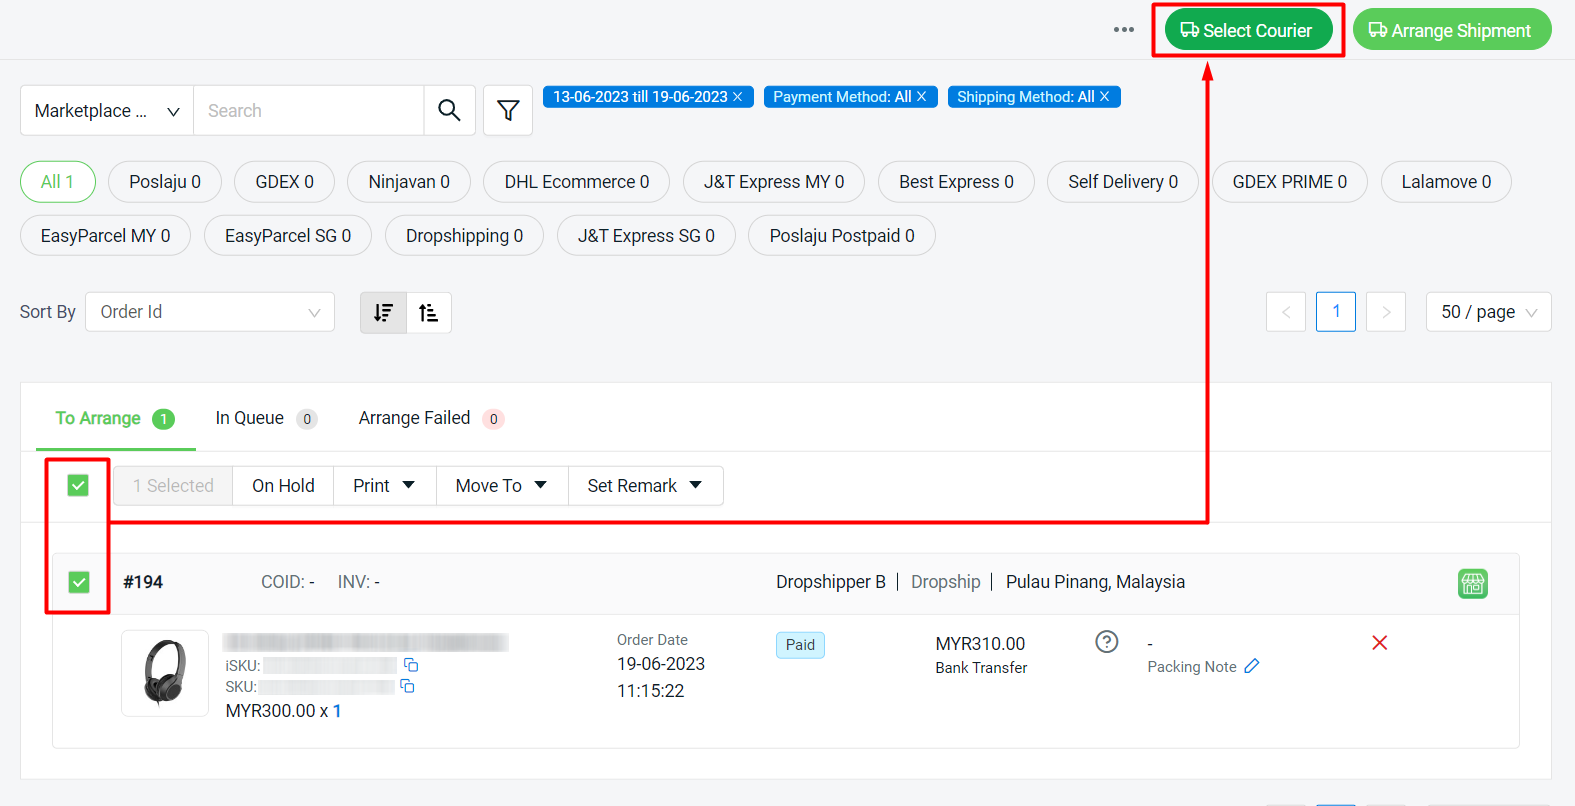
Step 6: Select Webstore and others > go to Pending > To Arrange tab.

Step 7: Select the order(s) > click on Select Courier to assign courier service.
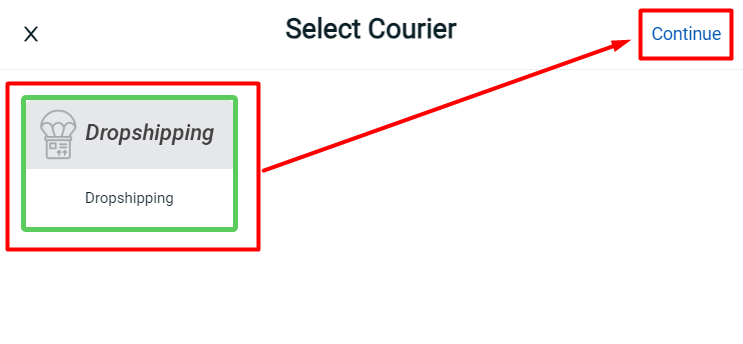
Step 8: Choose Dropshipping > Continue.
Step 9: Select the order(s) again > Click on Arrange Shipment button.
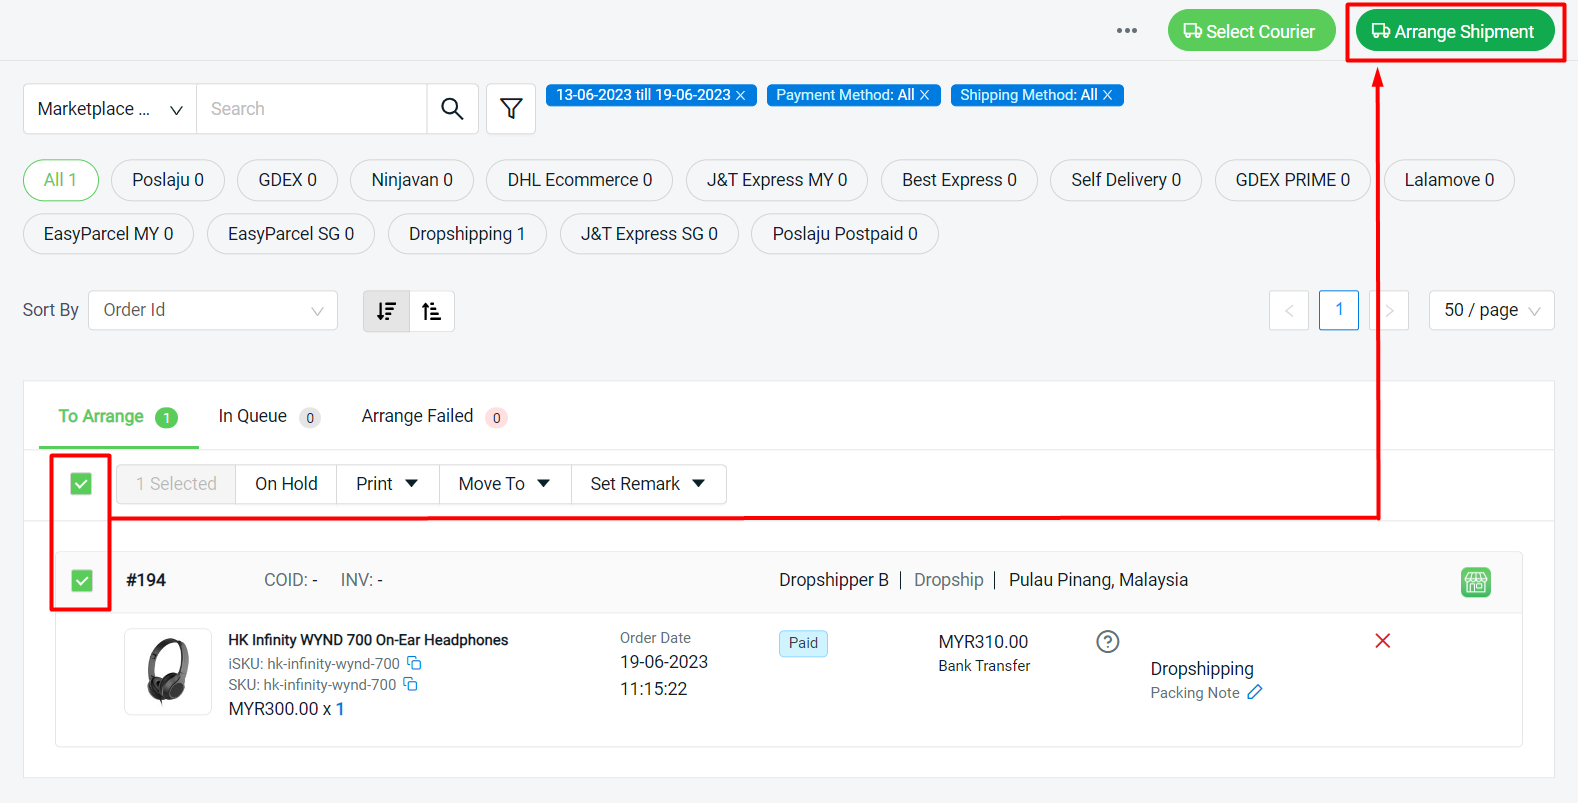
Step 10: Copy the tracking number from the customer remark and paste it on the Tracking Number column > Continue. Otherwise, you may retrieve it from the fulfillment shipping label uploaded on the Order details page.

Step 11: Go to To Process > To Print tab.

Step 12: You may print the Pick List before printing out the shipping label. (optional)
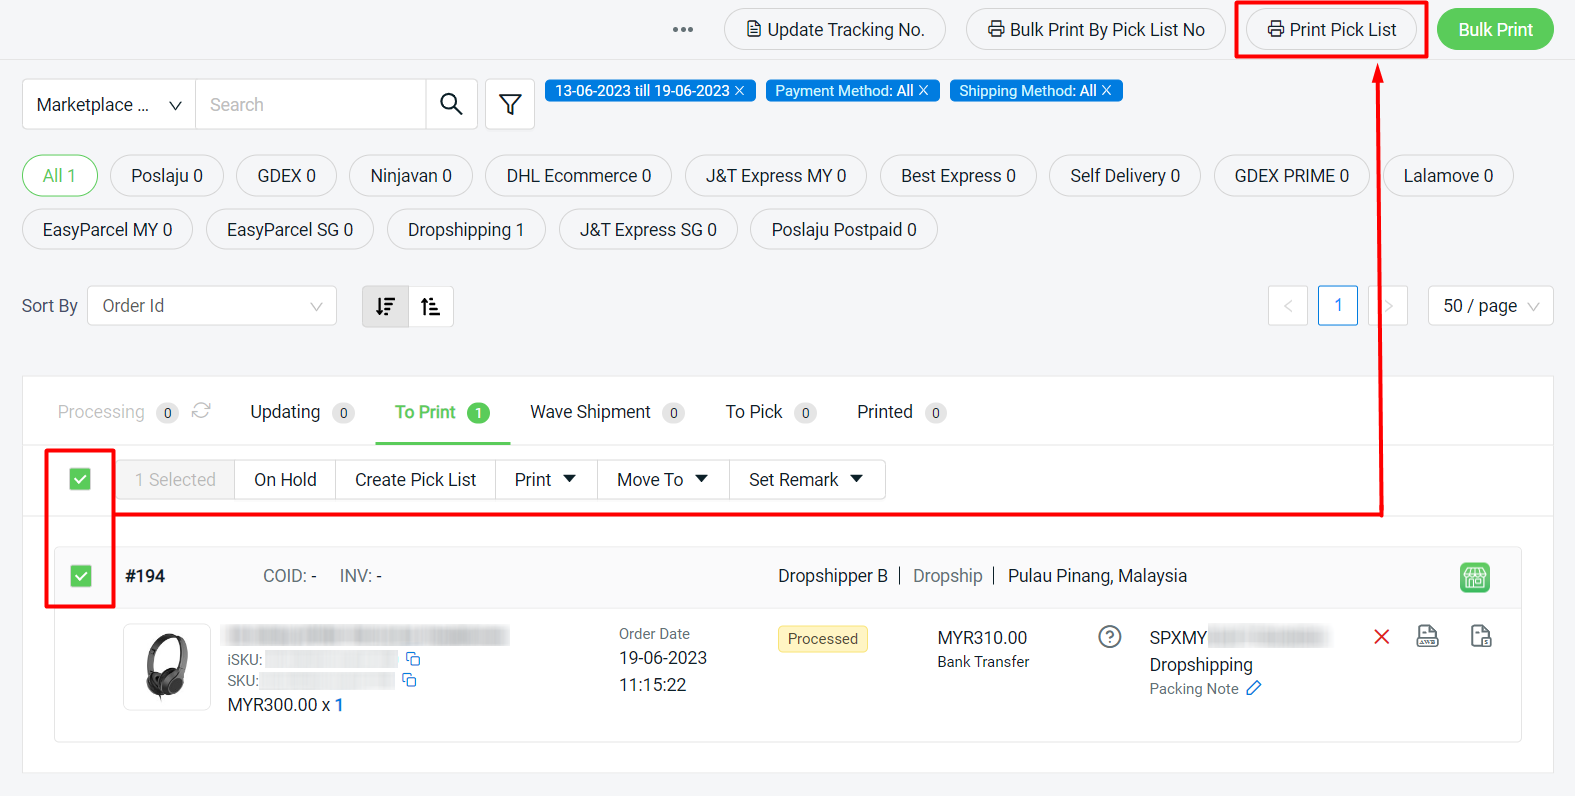
Step 13: Select the order(s) > click on the Bulk Print button to print the shipping label.
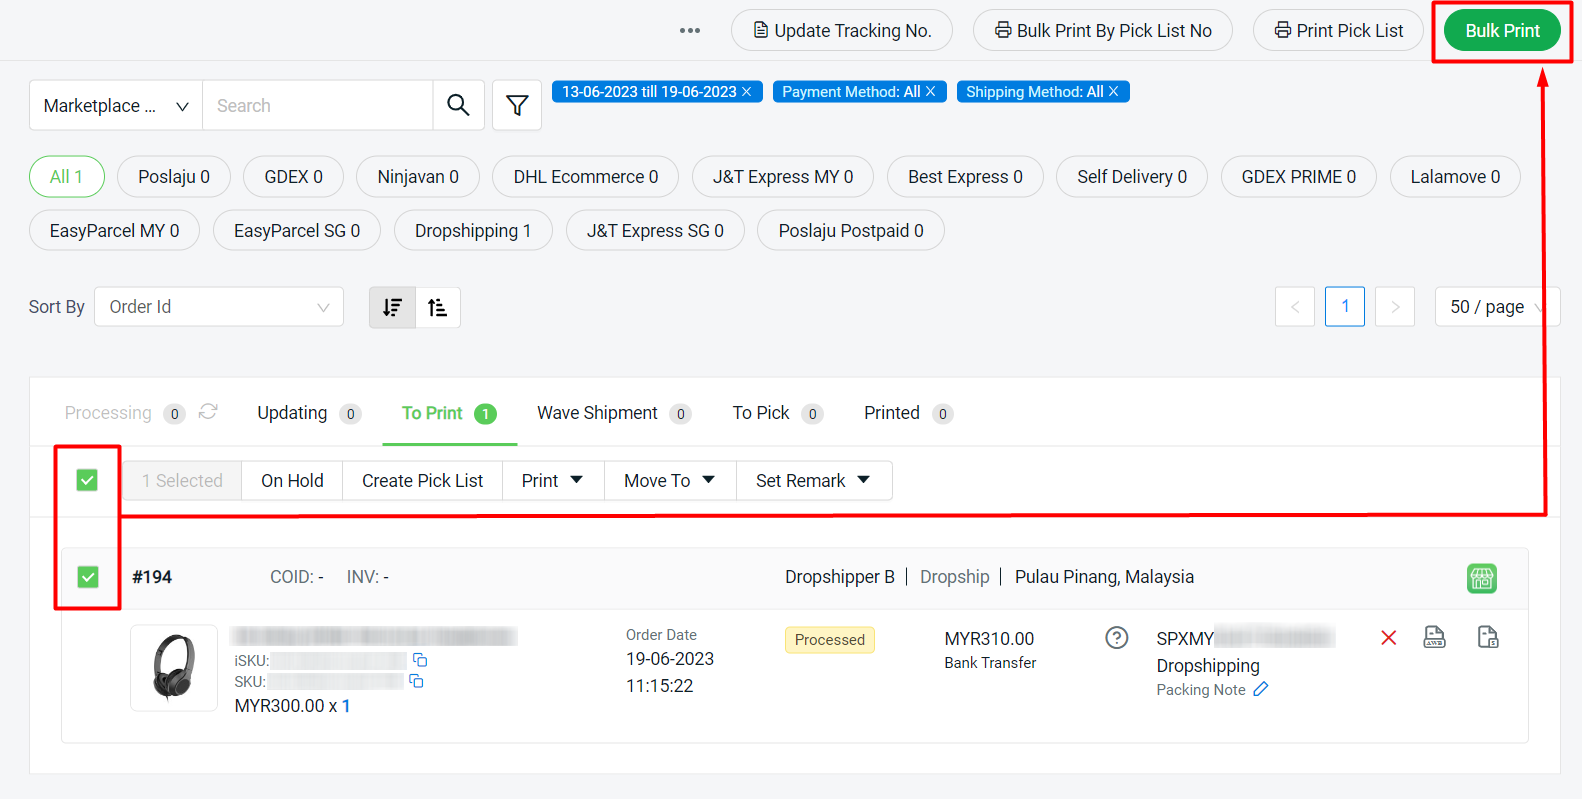
Step 14: Click on the Print button from the preview page to print out the shipping label uploaded by dropshipper.
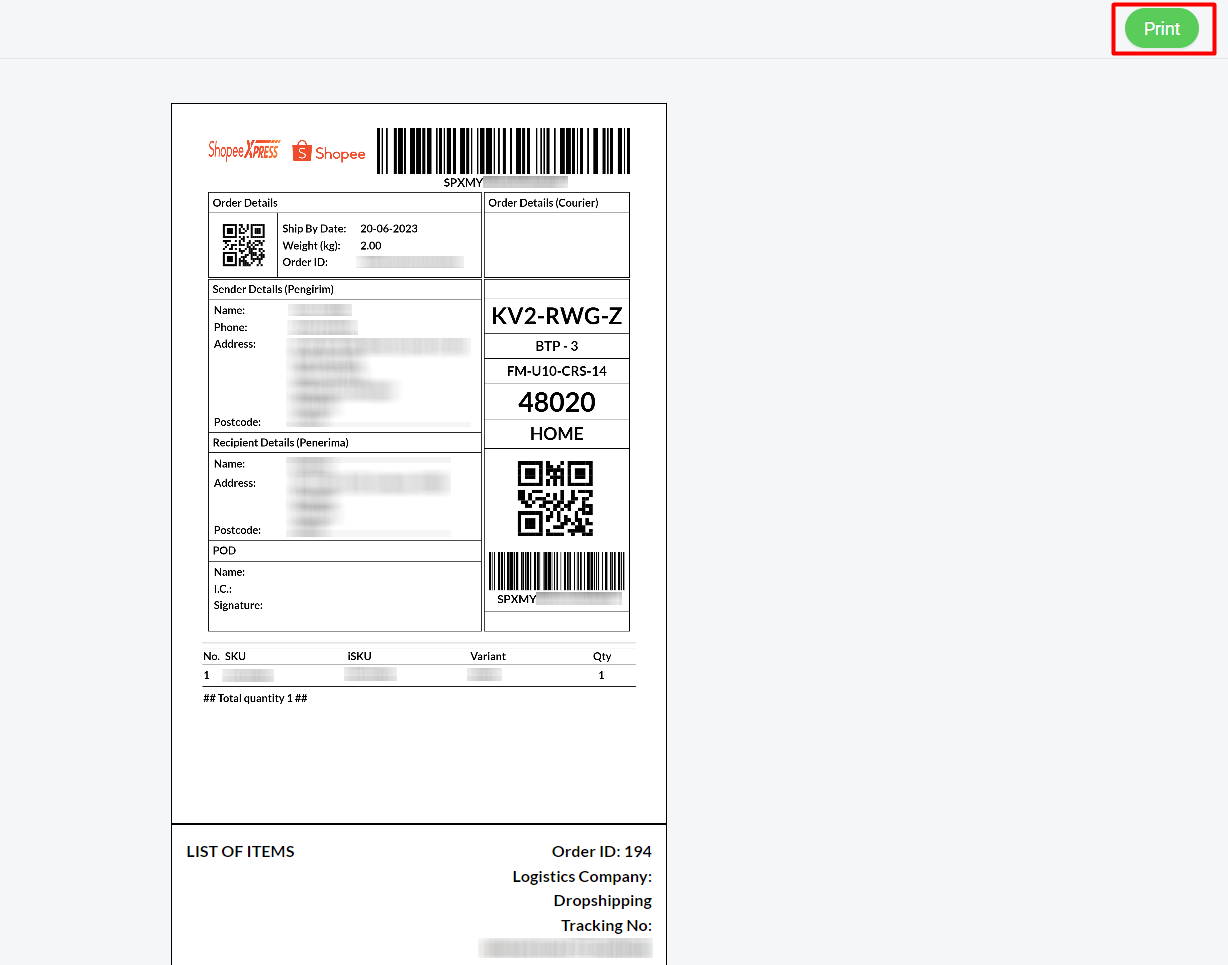
?Note: The system will only print out the 1st page from the shipping label attachment uploaded by dropshipper.
?Additional Information
1. If the shipping label is generated from you, you may upload the shipping label so that your dropshipper is able to retrieve it.
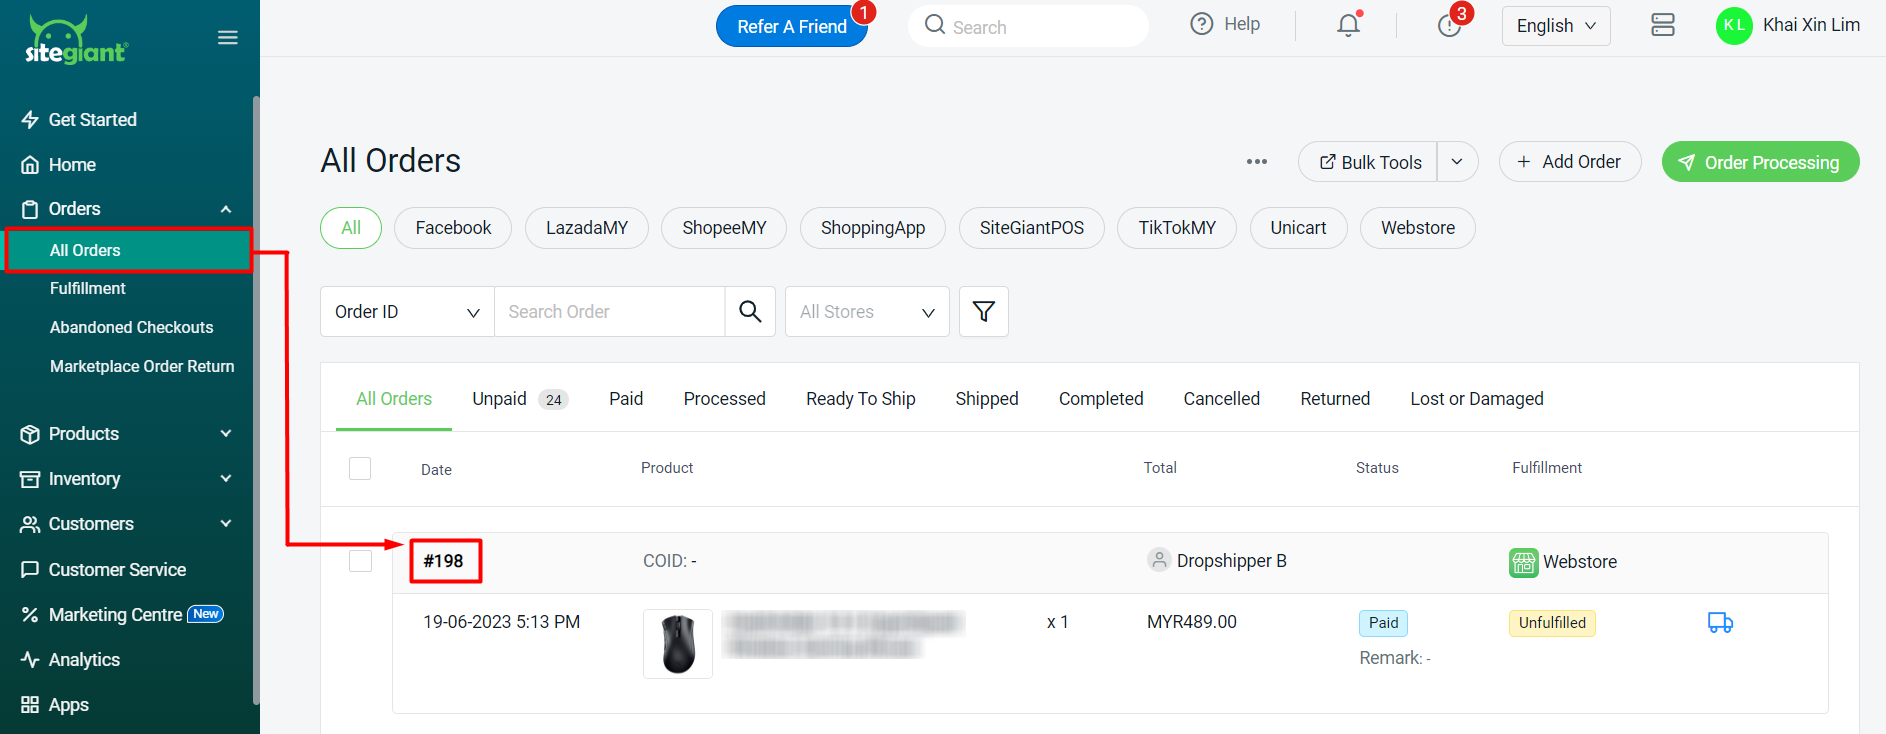
Step 1: Navigate to Orders > All Orders > click on the Order ID.
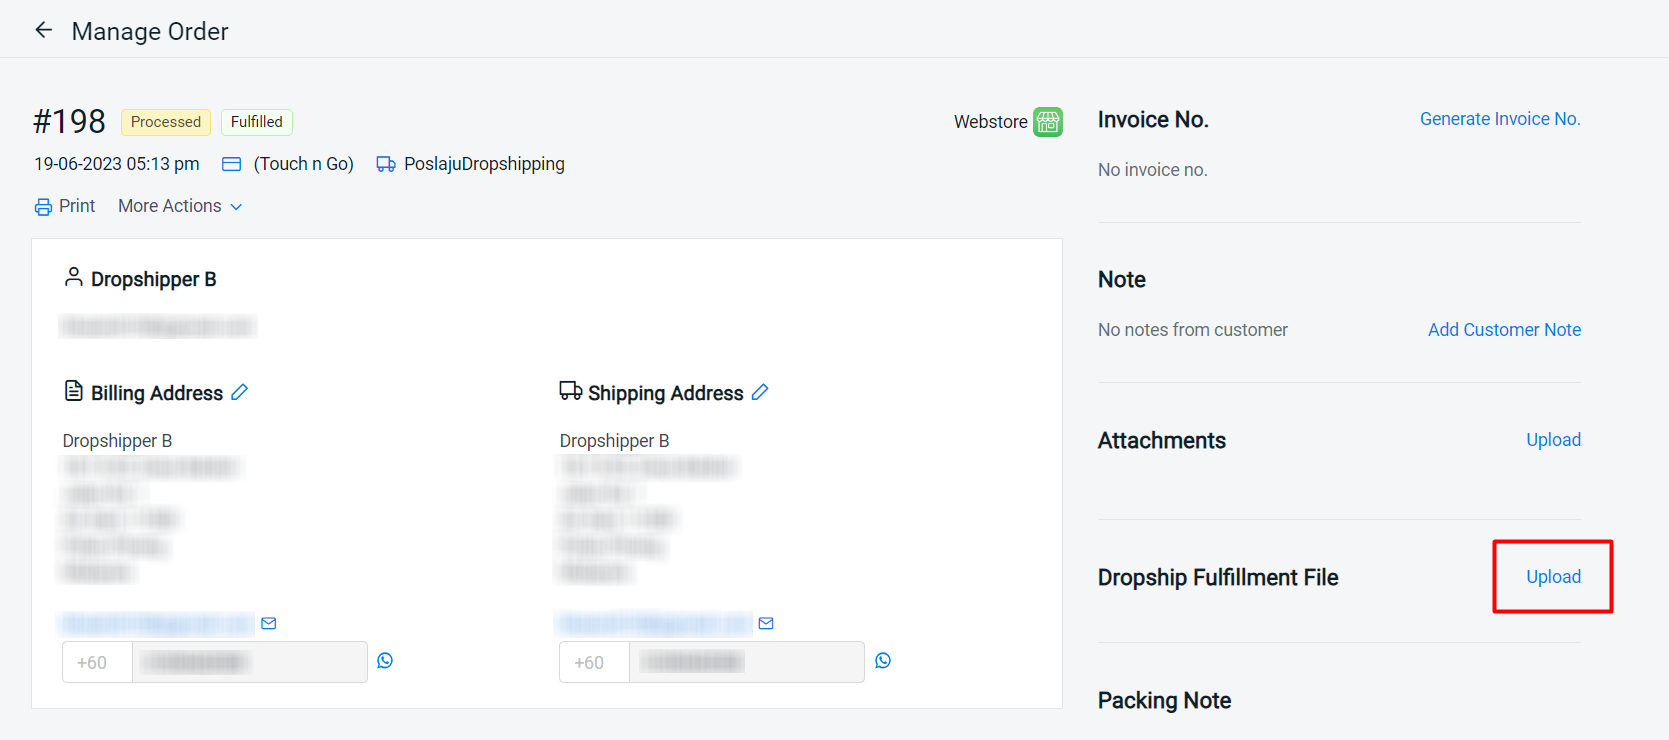
Step 2: If you enabled Show On Order Details at Uploader Display Settings, you will find this Dropship Fulfillment File section on the right.
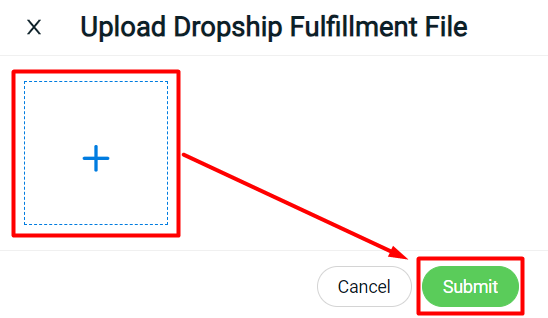
Step 3: Upload the shipping label > Submit.
Step 4: Dropshippers when checking their order from My Order, can click on Fulfillment Uploaded to download the shipping label.
