1. Introduction
2. Get EasyParcel Integration Key
3. Set Up EasyParcel Integration
4. Arrange Shipment With EasyParcel
1. Introduction

EasyParcel provides E-commerce shipping solution with multiple courier choices and the best shipping rate for parcel delivery booking. With the EasyParcel integration, you can sync the order from SiteGiant to EasyParcel for order fulfillment without the need to enter them manually. It will save you time and prevent human mistakes in the process.
2. Get EasyParcel Integration Key
Step 1: Sign up and log in to the EasyParcel account
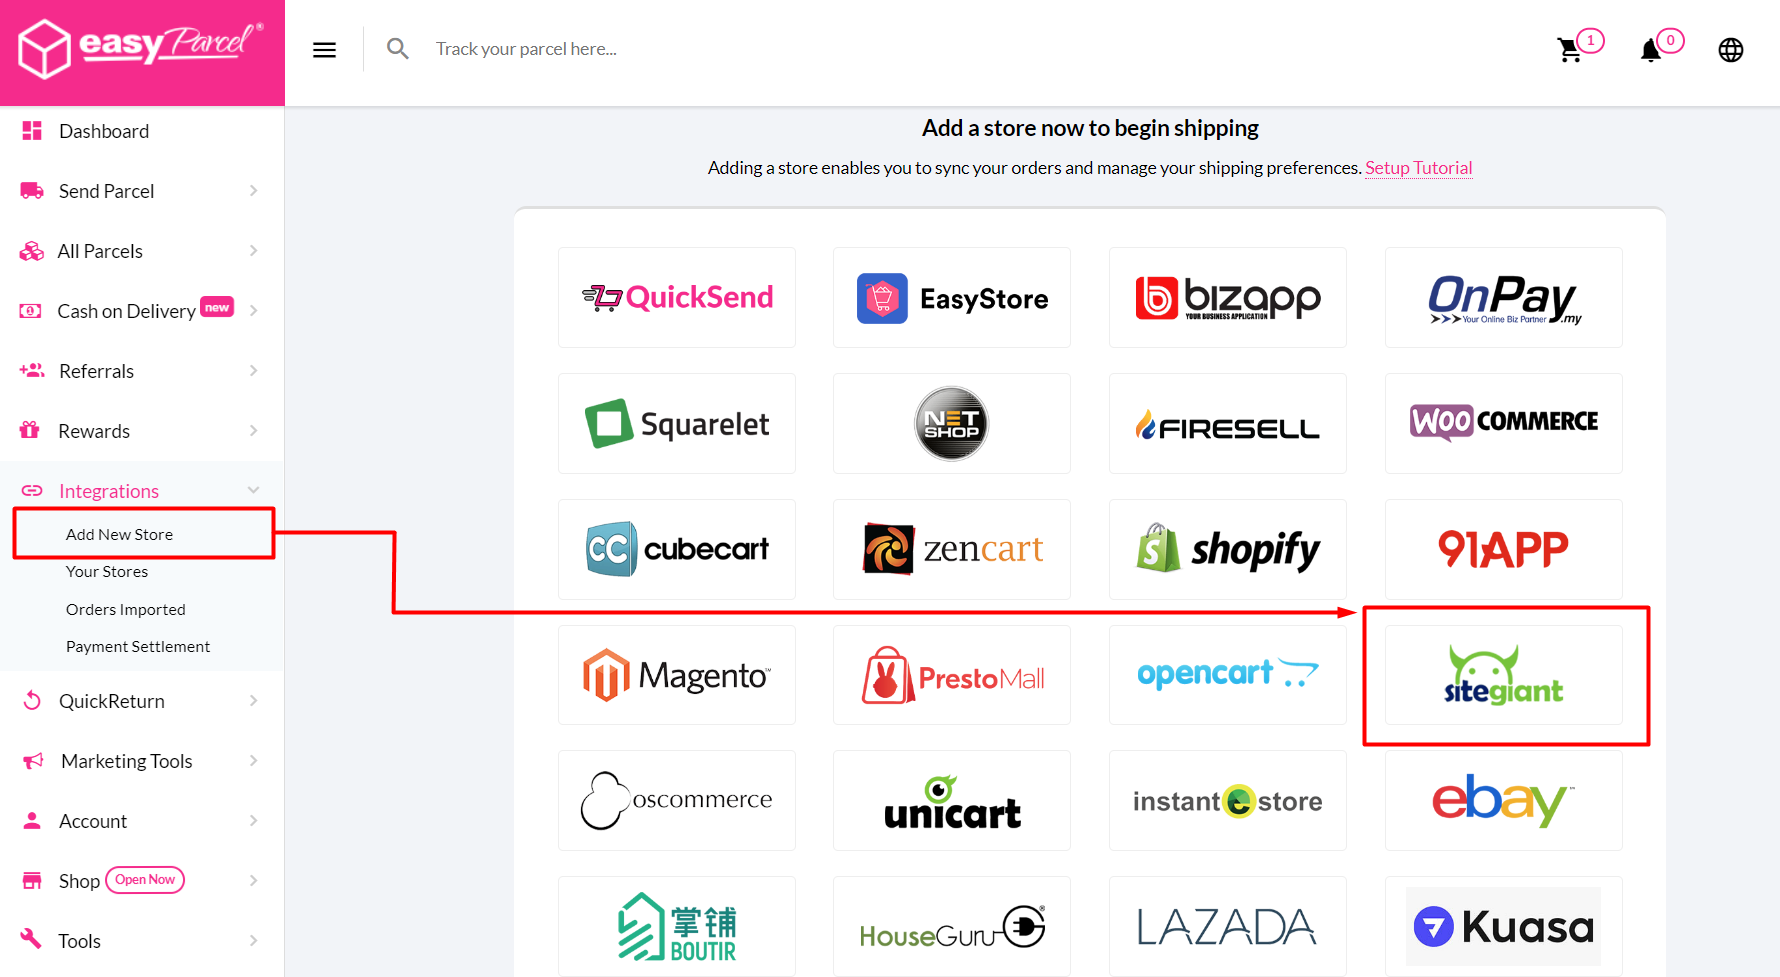
Step 2: Click on Integrations > Add New Store > choose SiteGiant
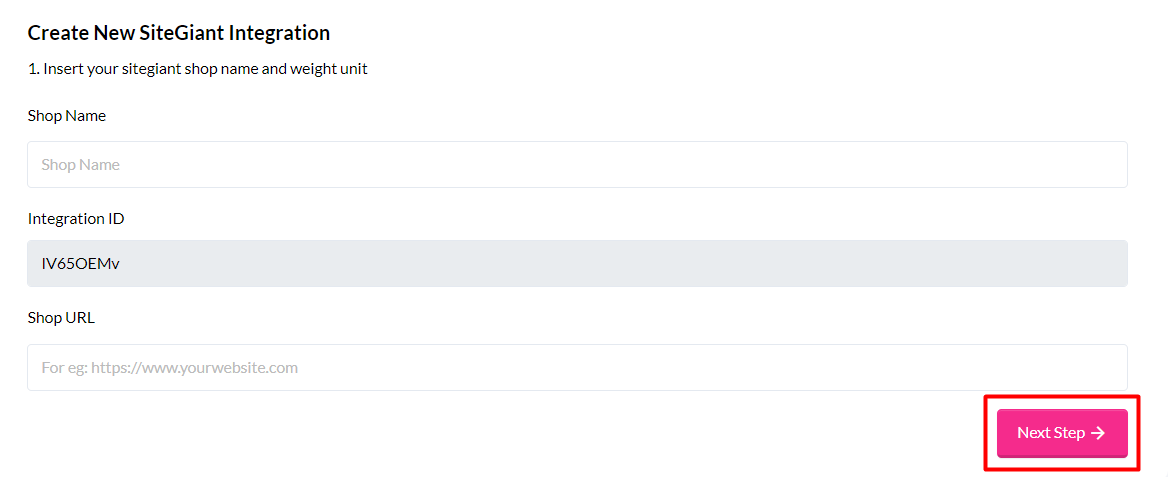
Step 3: Insert the Shop Name and Shop URL > click on Next Step
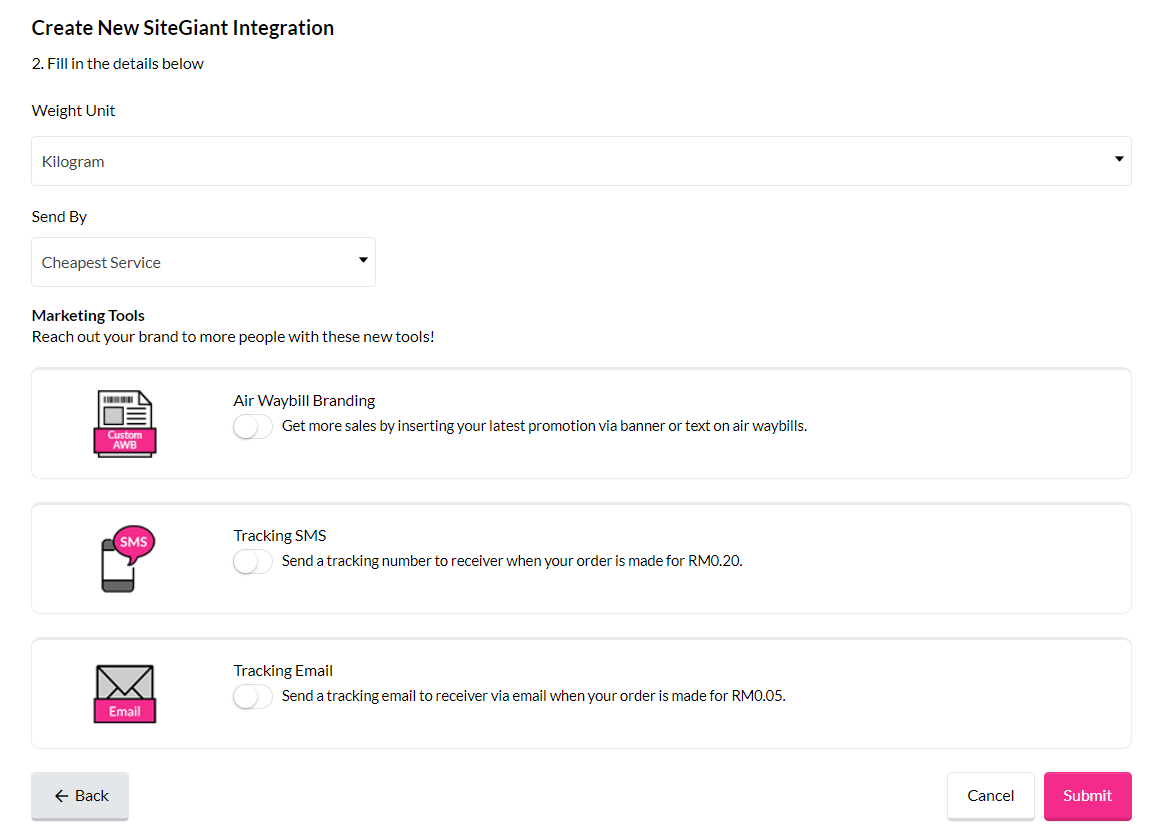
Step 4: Choose the Weight Unit as Kilogram > choose to send by which service > Submit
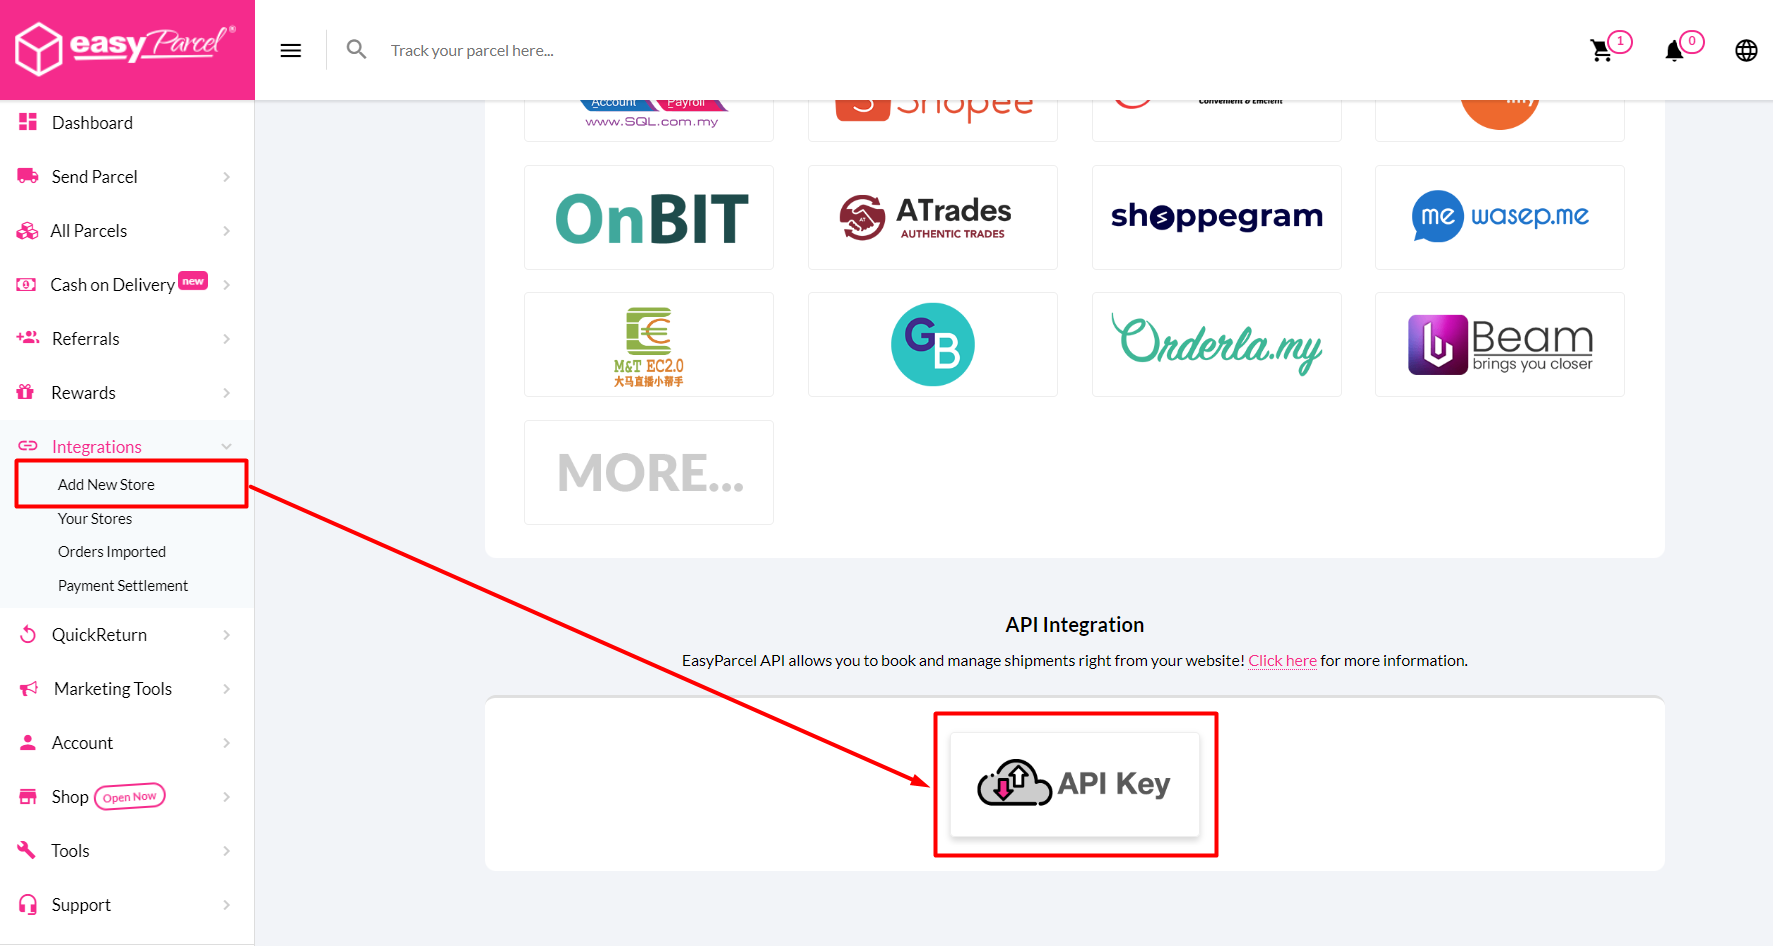
Step 5: Go to Integrations > Add New Store > scroll down to the bottom of the page and click on the API Key button
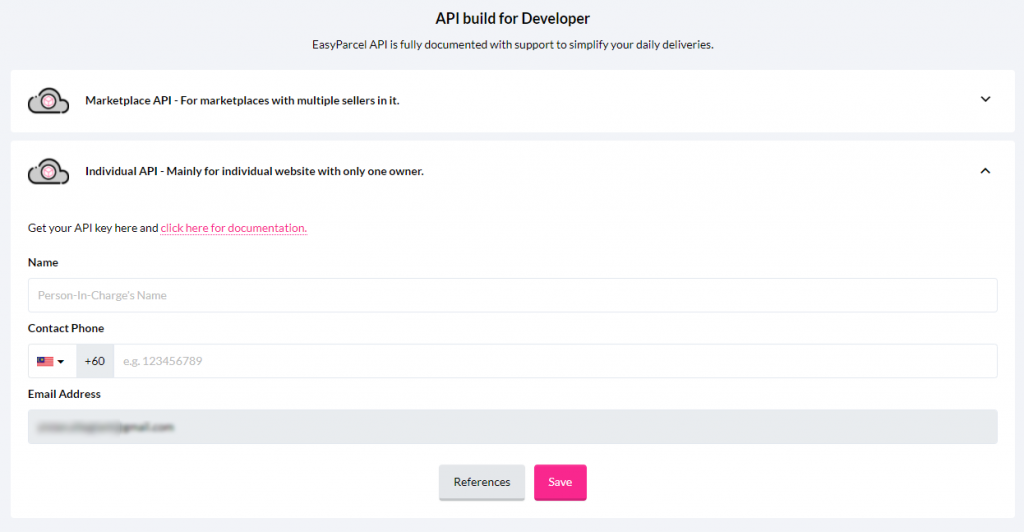
Step 6: Choose Individual API > fill up your Name and Contact Phone > Save
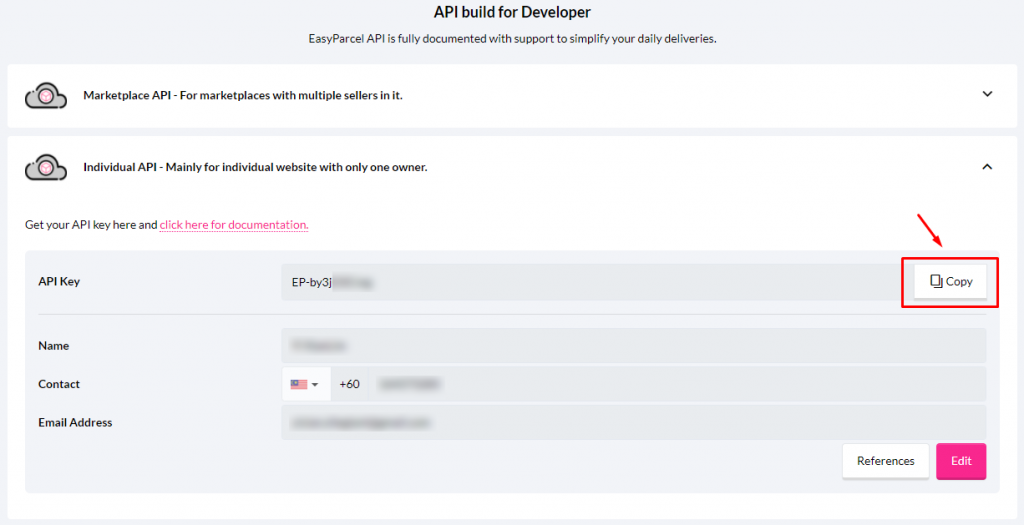
Step 7: The API Key will then be generated > copy the API Key for later use
3. Set Up EasyParcel Integration
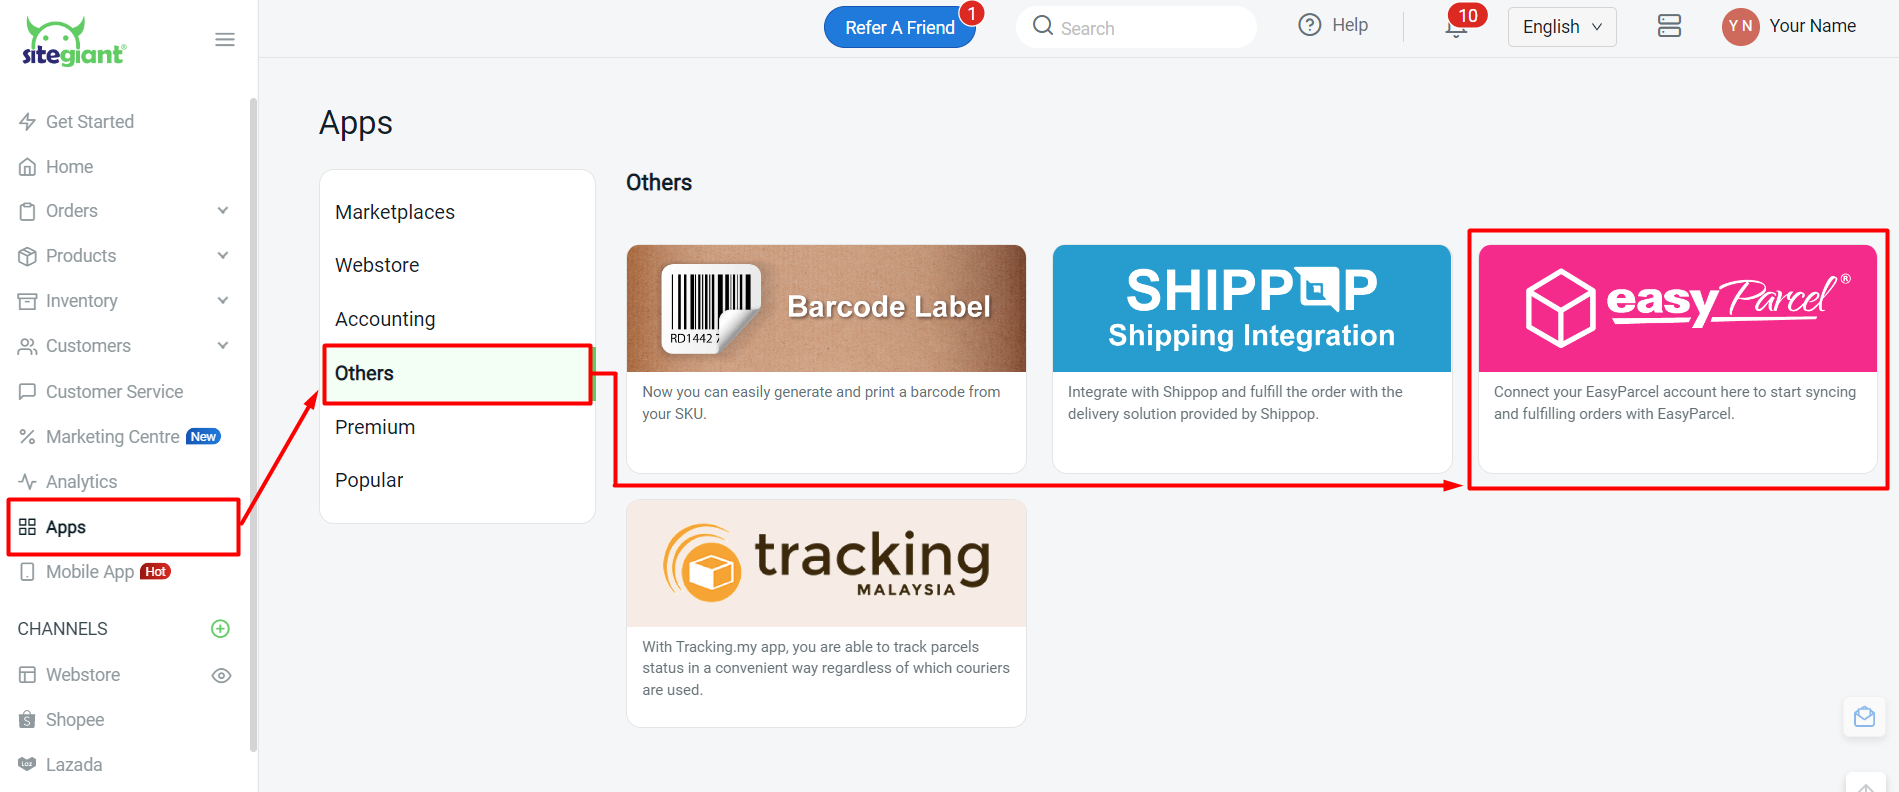
Step 1: Go to Apps on the dashboard menu > Others > click on the EasyParcel
Step 2: Enable the Status > fill up the details for EasyParcel Settings

1. Name*: The Store Name or Company Name
2. EasyParcel Registered Email*: The email address registered with EasyParcel
3. Phone*: Your contact number
4. API Key*: API Key copied from EasyParcel
5. Service Type*: Choose Dropoff, Pickup or both
6. Sender Collection Address*: Your parcel collection address
7. Courier Company: Choose the Courier Company that you wish to use for order fulfillment
Step 3: Click on the Save button once done settings
4. Arrange Shipment With EasyParcel
Method 1: Sync Order To EasyParcel
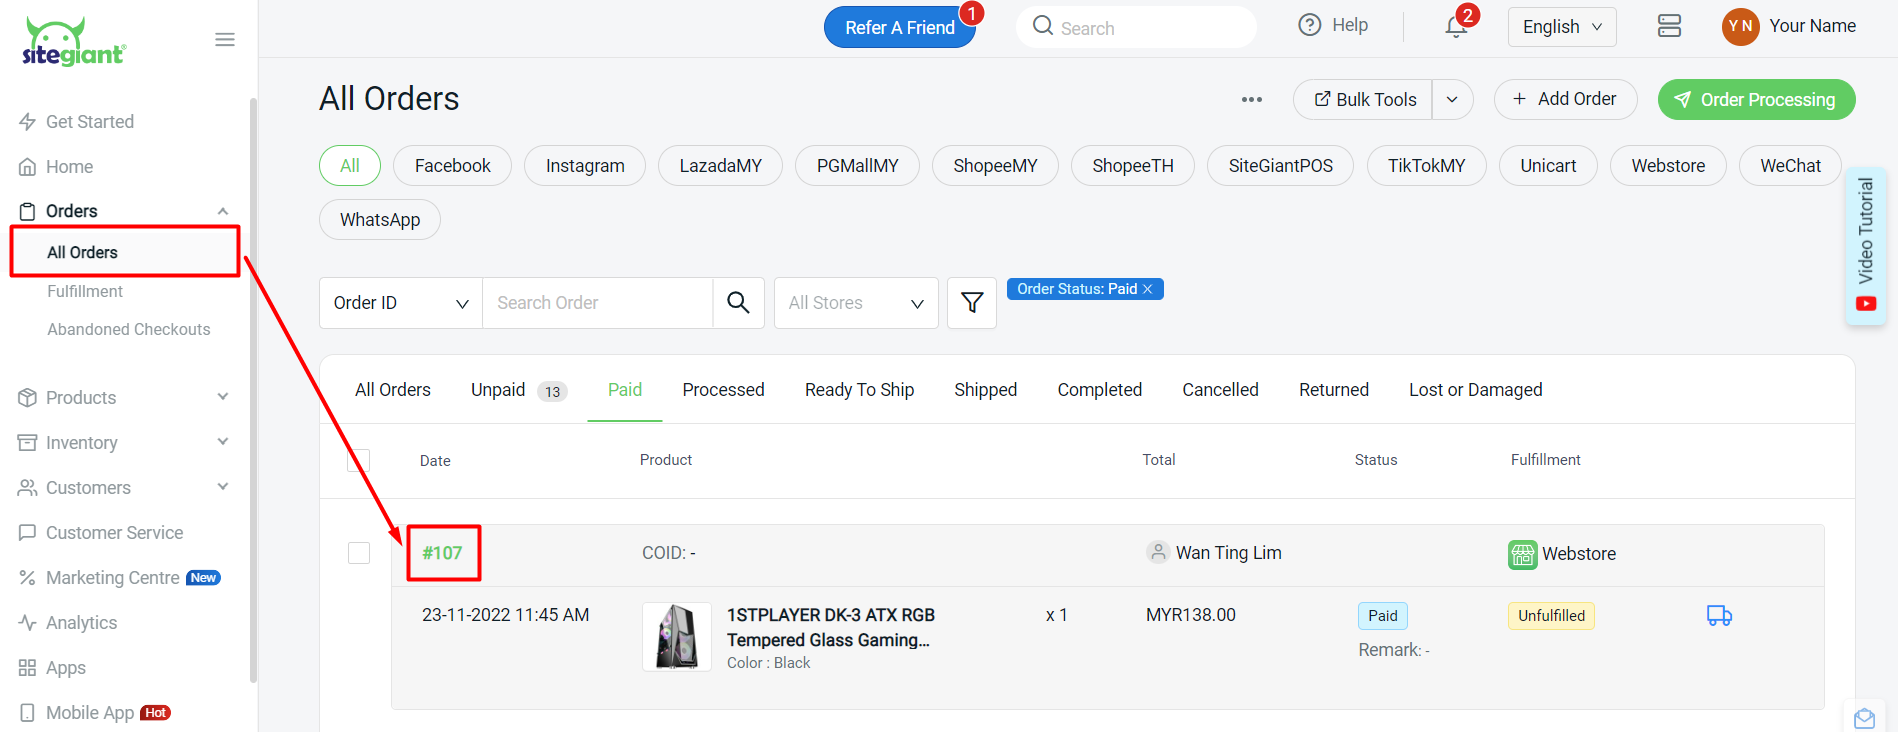
Step 1: Go to All Orders > click the Order Number to go into the Manage Order page
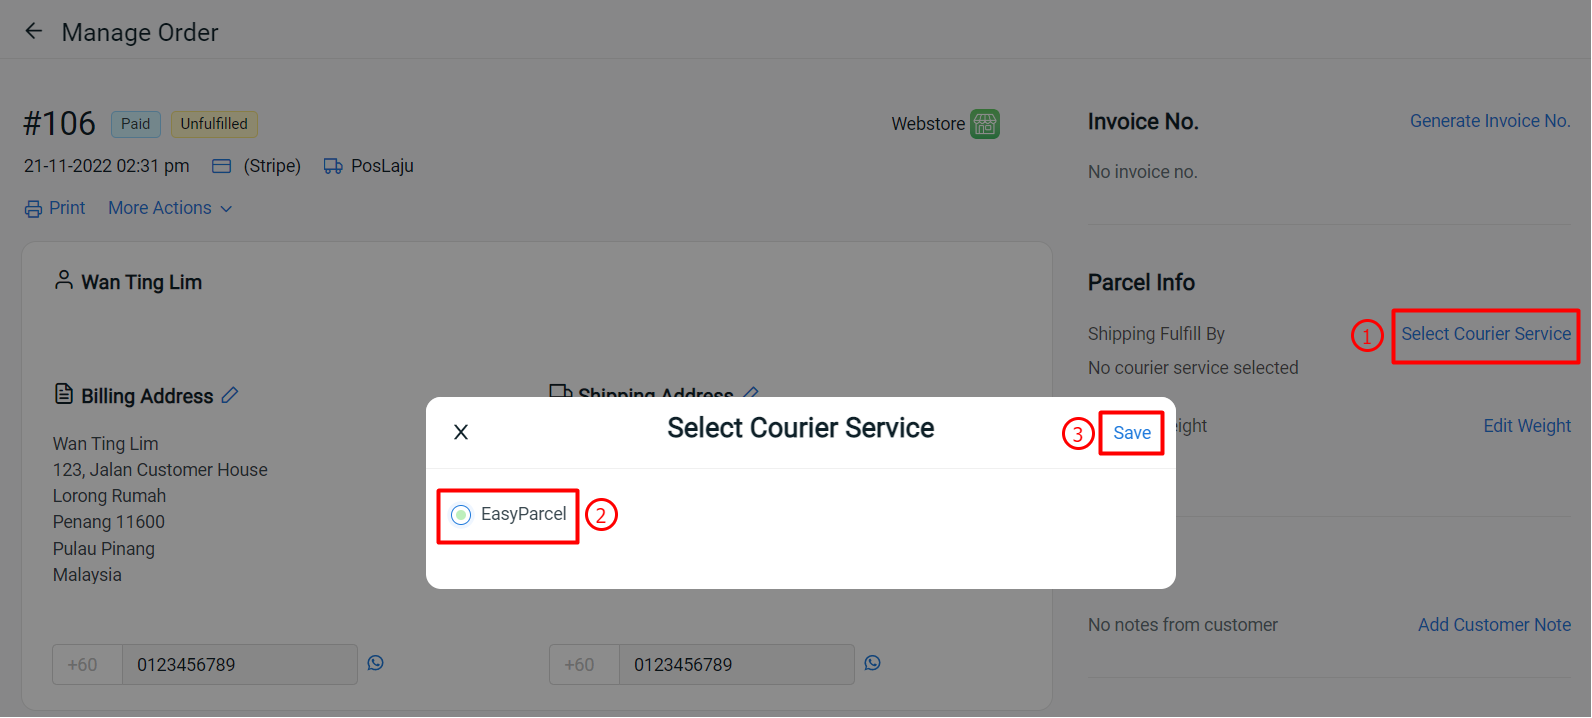
Step 2: Under the Parcel Info section, click on Select Courier Service > select EasyParcel as the Courier Service > Save
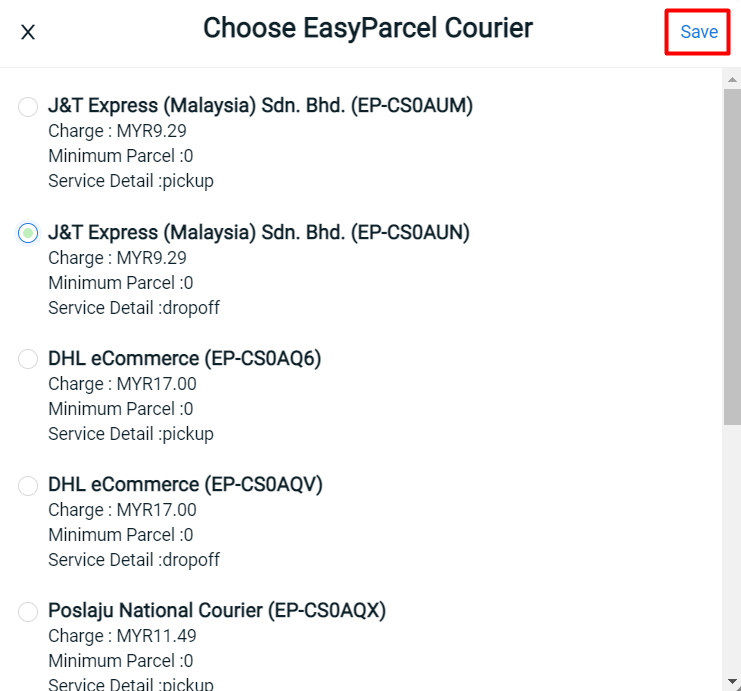
Step 3: Choose your preferred Courier Service > click on Save to confirm
?Note: You will have to top up credit in EasyParcel first in order to sync the order from SiteGiant ERP
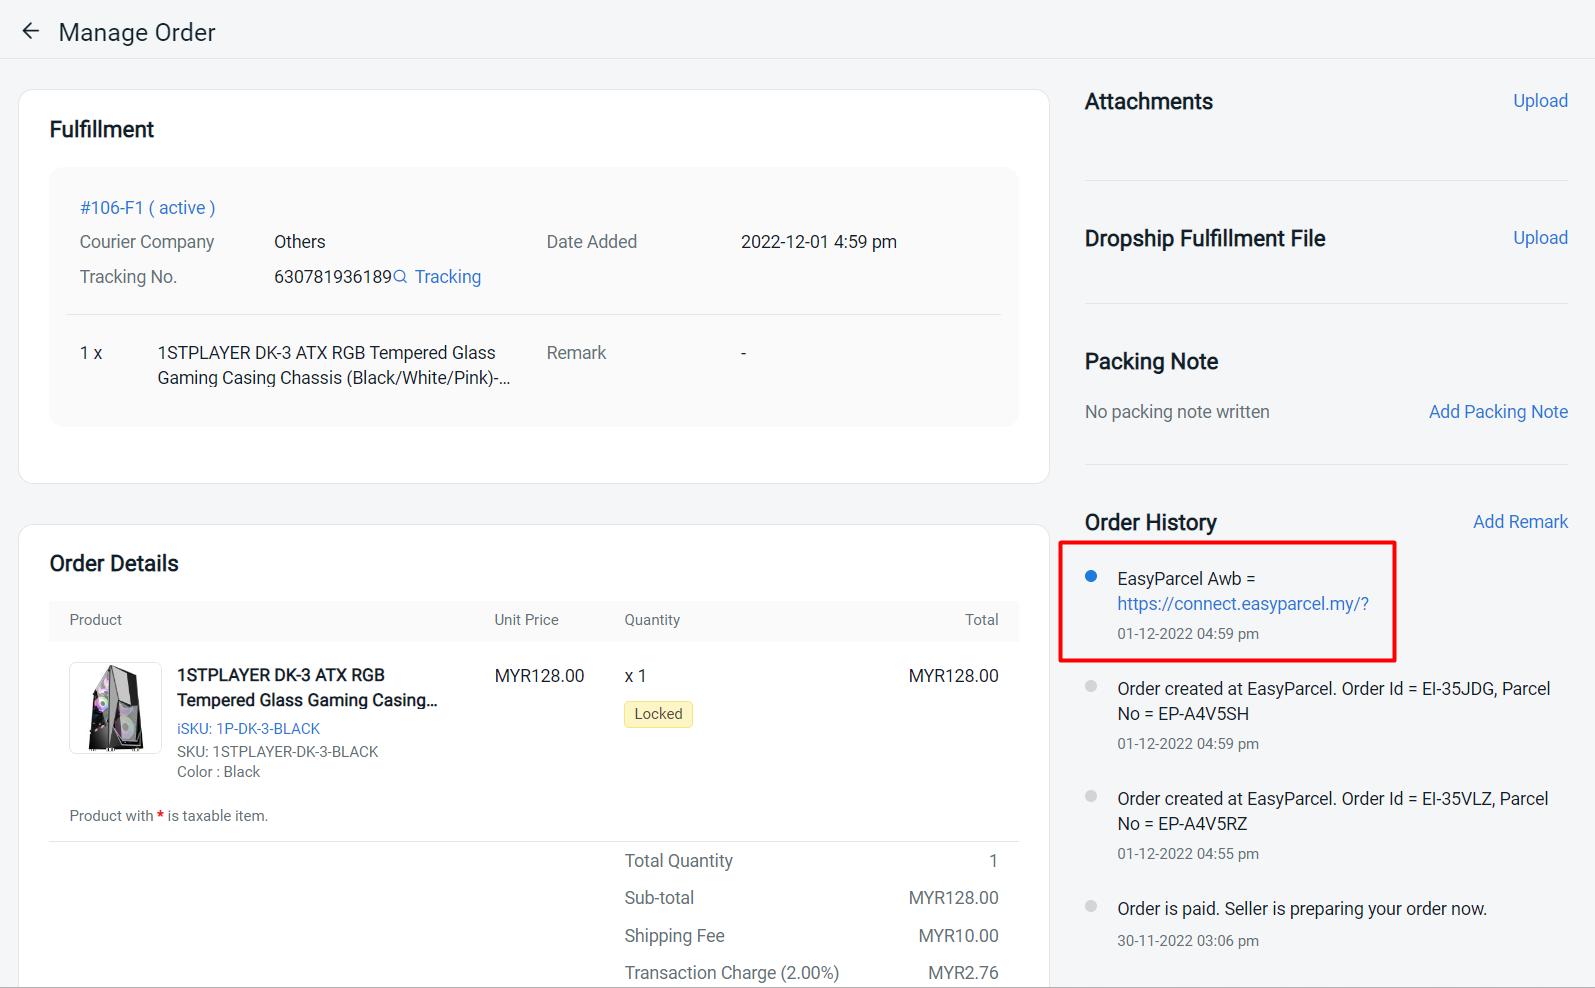
Step 4: After the order is successfully synced, scroll down to the Order History section > click on the EasyParcel AWB link to proceed with shipping label printing
Method 2: Using Order Processing
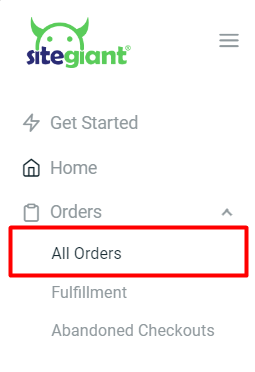
Step 1: Navigate to Orders > All Orders
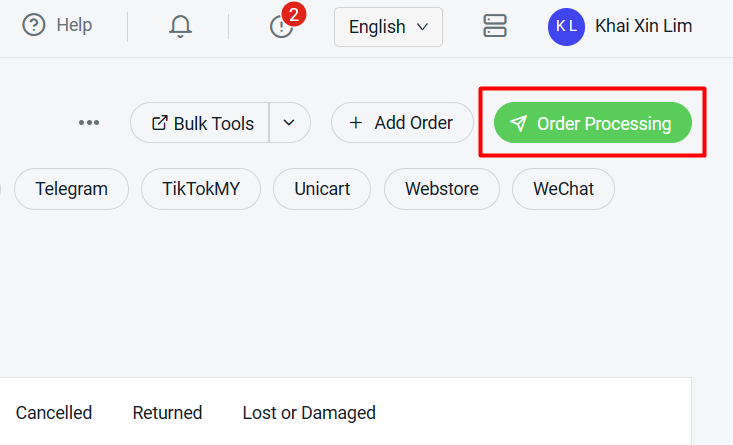
Step 2: Click on Order Processing Button
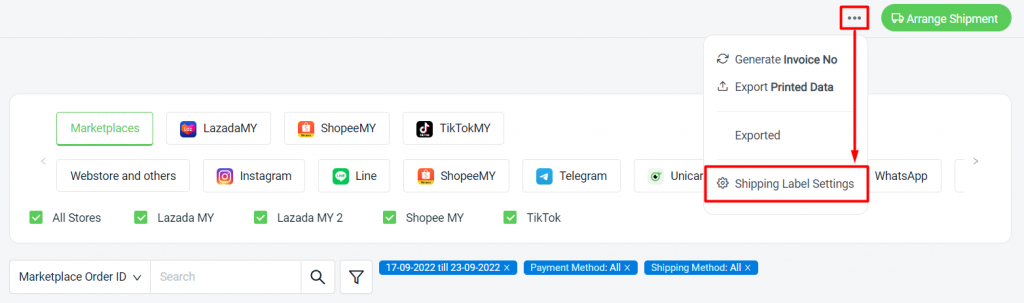
Step 3: Click on More (…) > Shipping Label Settings
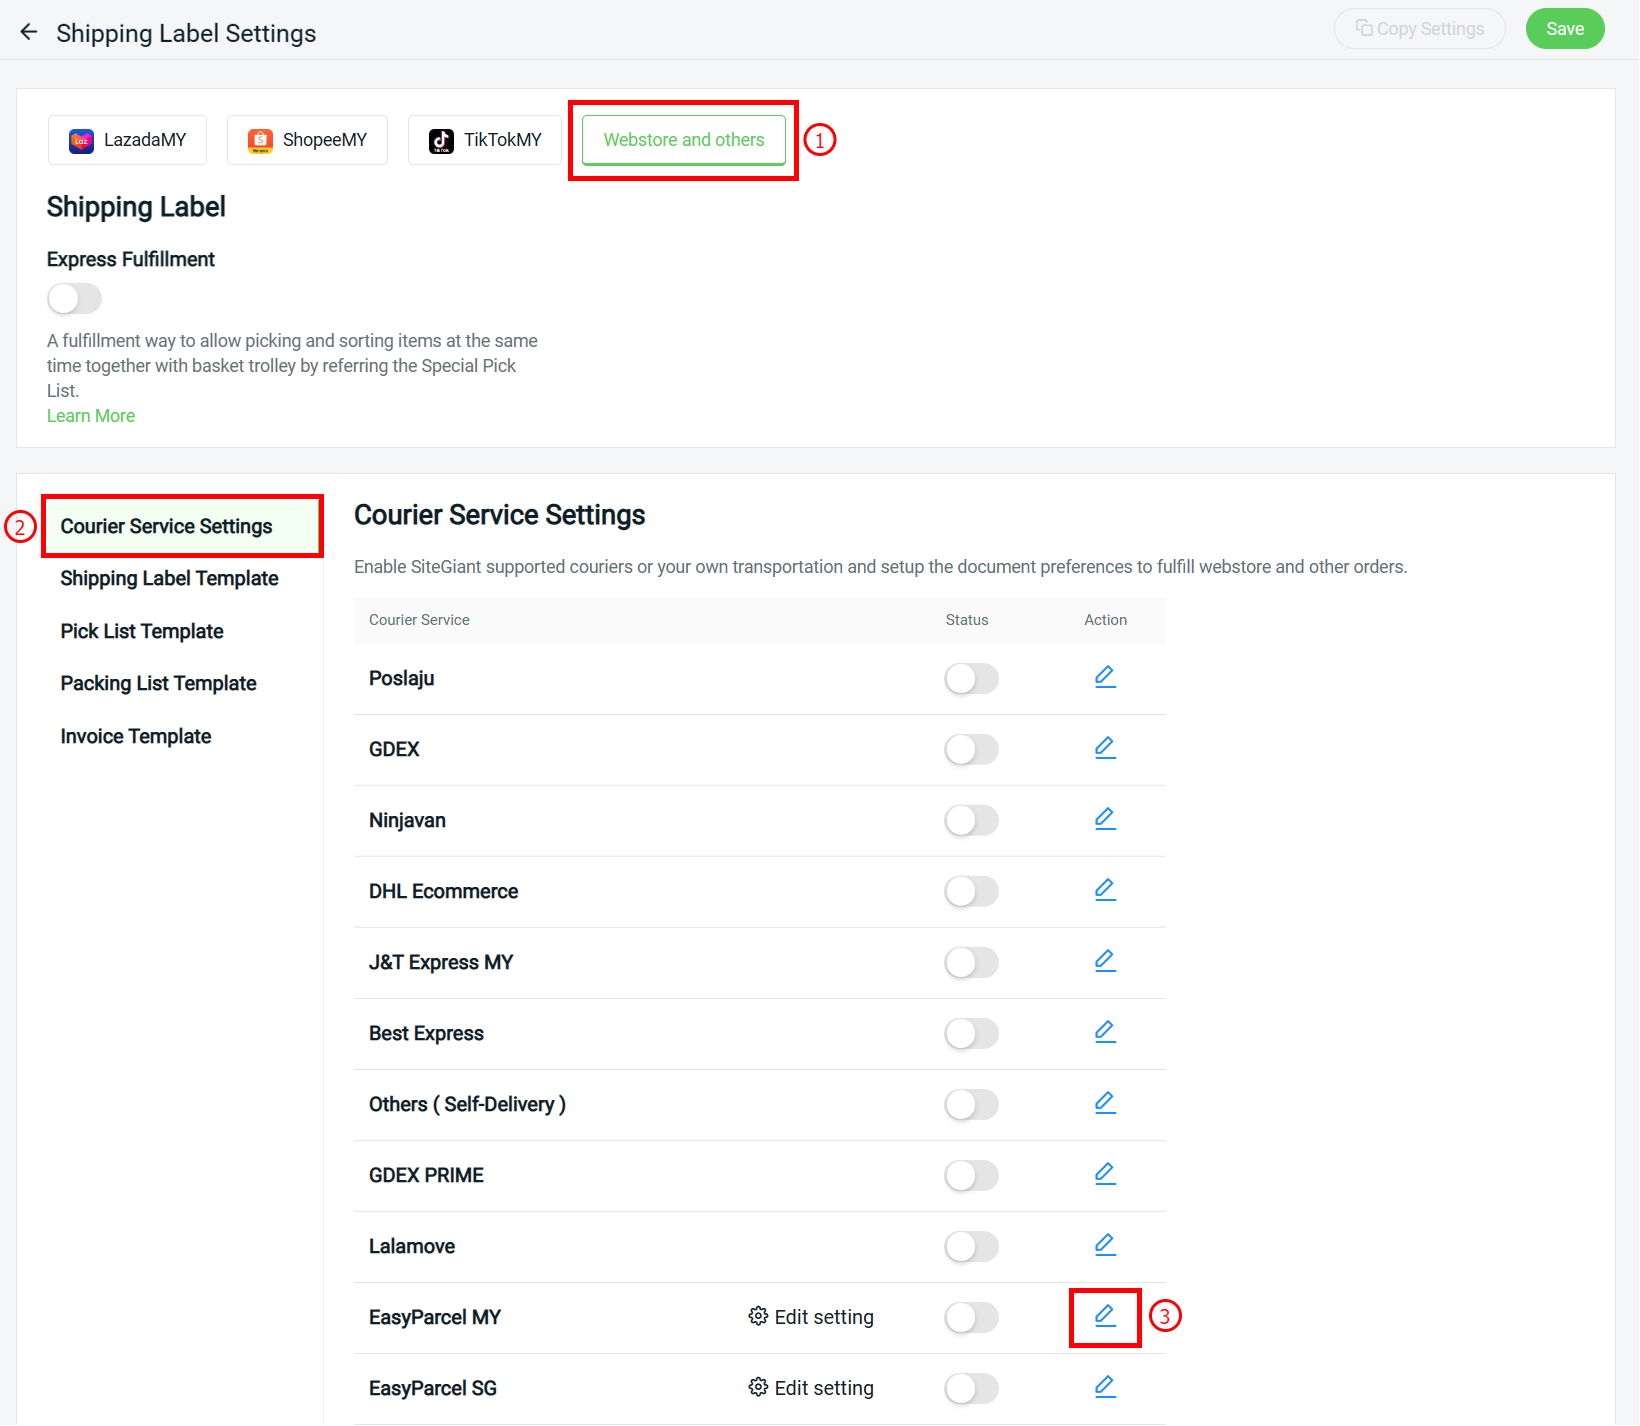
Step 4: Select Webstore and others > Courier Service Settings > click on EasyParcel MY edit button
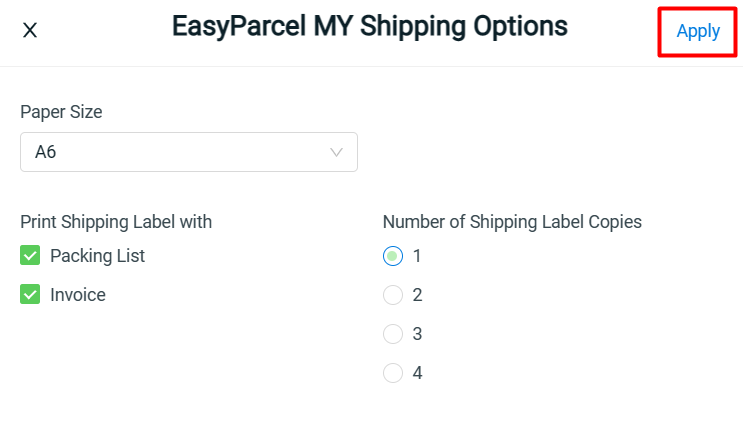
Step 5: Configure preferred shipping options > Apply
Step 6: Save the Shipping Label Settings > you may now process the order and print the shipping label using EasyParcel
?Tips: Refer to How To Print Webstore And Others Shipping Label