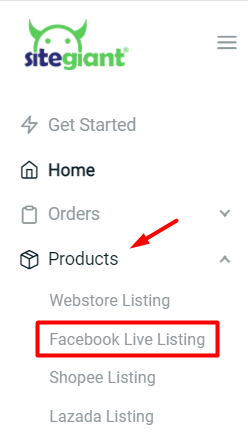
1. Go to the Products menu and click on Facebook Listing.
![](https://support.sitegiant.com/wp-content/uploads/2022/03/ProductListing_FBLive.png)
2. Click on the Add Product button.
![](https://support.sitegiant.com/wp-content/uploads/2022/01/woocommerce-listing-add-product.png)
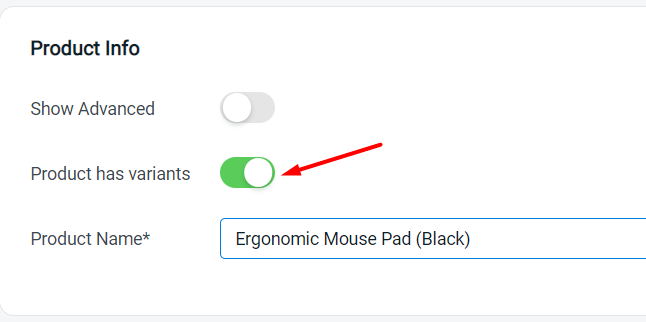
3. Enable the option for Products as variants.
4. Enter the Product Name.
![](https://support.sitegiant.com/wp-content/uploads/2022/03/FBListing_EnableVariant.png)
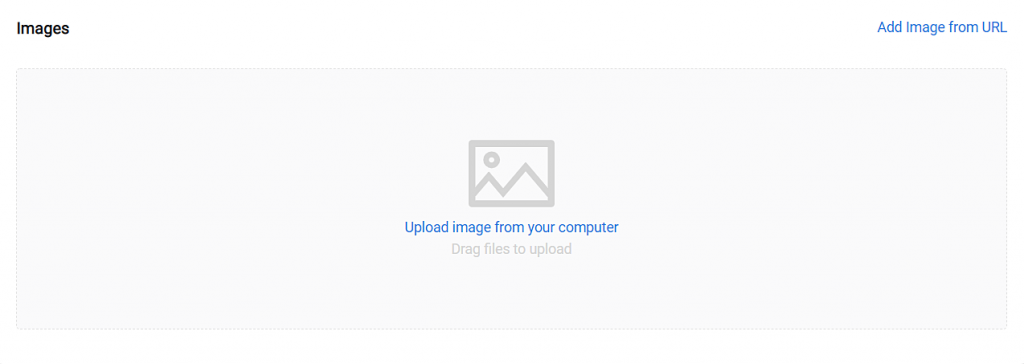
5. Upload product Images.
![](https://support.sitegiant.com/wp-content/uploads/2021/05/product-upload-images-1024x364.png)
6. Enter the variant option name and their values accordingly.
![](https://support.sitegiant.com/wp-content/uploads/2022/03/FBListing_VariantOptions-1024x170.png)
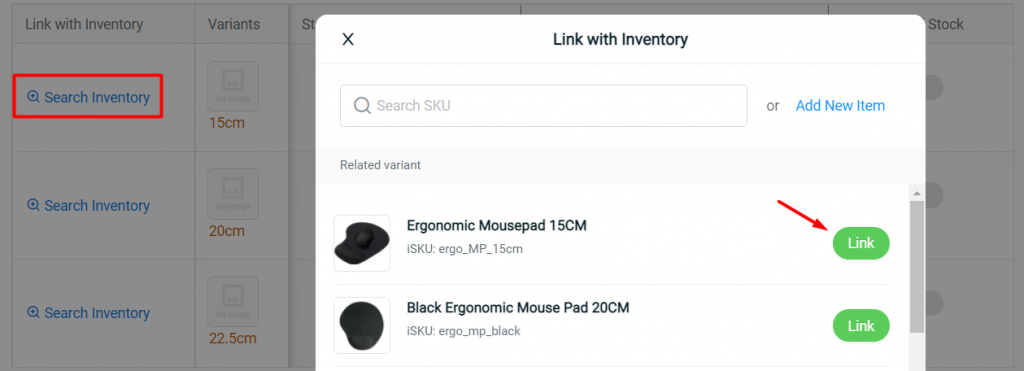
7. Link your variants with its Inventory Item.
![](https://support.sitegiant.com/wp-content/uploads/2022/03/FBListing_VariantLinking-1024x371.png)
7. Enter the variant Price.
![](https://support.sitegiant.com/wp-content/uploads/2022/03/FBListing_VariantPrice-1024x274.png)
8. Enable Track Inventory.
![](https://support.sitegiant.com/wp-content/uploads/2022/03/FBListing_TrackInventory.png)
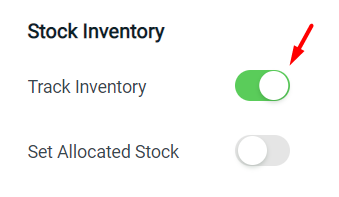
Set Allocated Stock: To set aside a specific quantity to be used instead of using all the available stock for Facebook Live
9. Click on the Save button.
![](https://support.sitegiant.com/wp-content/uploads/2021/06/purchase-order-save-btn.png)