1. Introduction
2. Add Inventory Item
1. Introduction
Before you could start selling your products, you must first have stocks available and have a place to manage them. Let’s get started by adding and managing the stocks in your inventory.
2. Add Inventory Item
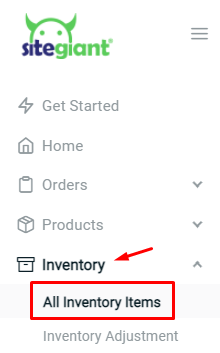
Step 1: Navigate to All Inventory Items from the Inventory menu
Step 2: Click + Add New Item > Add Inventory Item

Step 3: Fill in Item Info accordingly
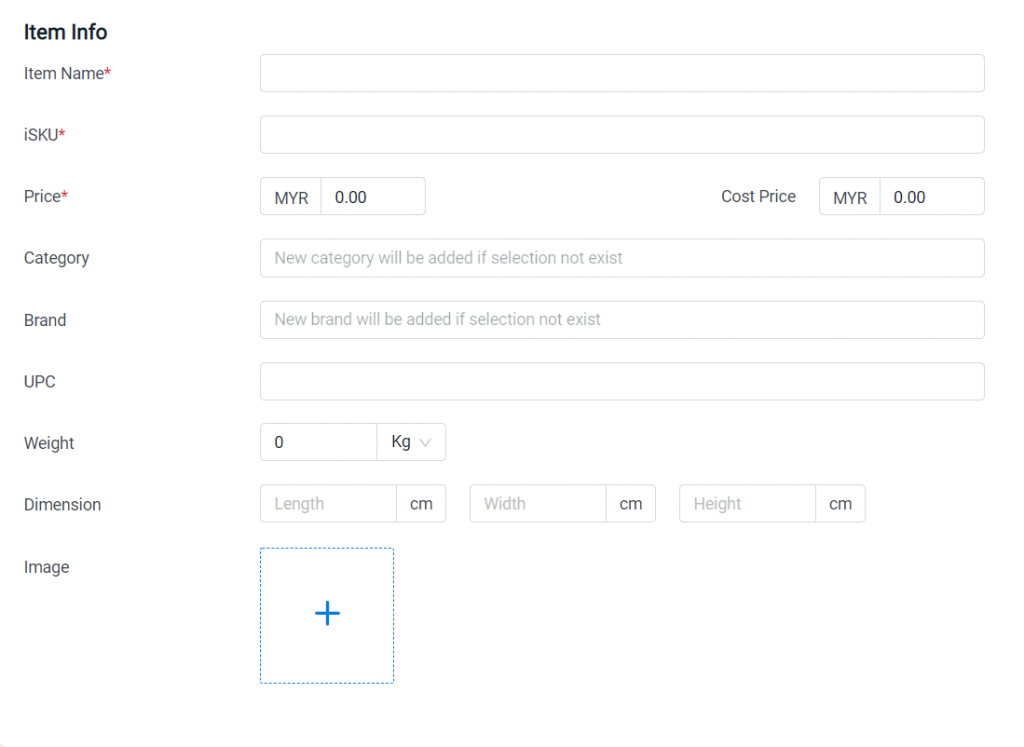
?Note:
1. Item info with * is required to fill in
2. Recommended image size: 800 x 800 pixels and below 300KB
Step 4: Select Warehouse, sellable stock, and set reserved stock if applicable
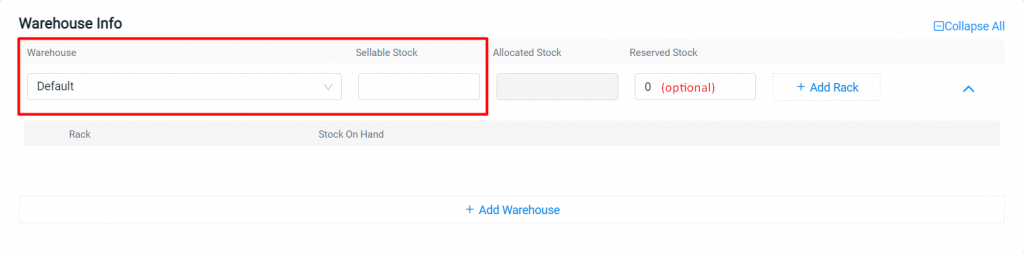
?Note: If you have only one Warehouse, that will be your default Warehouse. If you wish to change your Warehouse name, click here to learn more
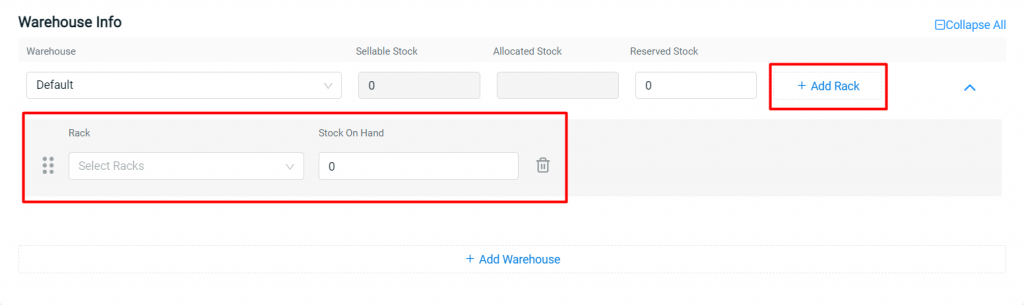
Step 5: Assign your item to Rack for a better reference of stock location when doing the order fulfillment (optional)
Step 6: Set the Safety Stock, Lead Time, and Stock Status
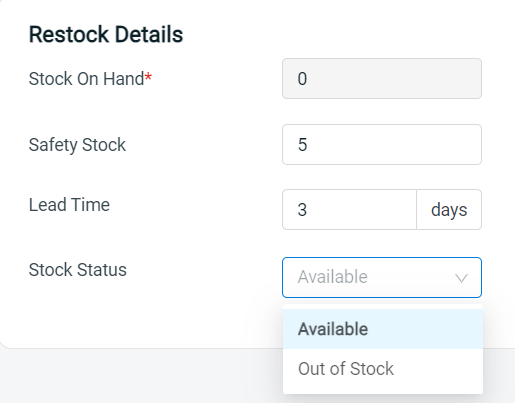
?Note:
Safety Stock: Minimum amount of stocks considered to be low quantity and need to restock soon
Lead Time: The number of days needed for the stock to arrive
Stock Status: If set to Out of Stock, system will sync zero "0" quantity to all sales channels
Step 7: Save and done!