1. Introduction
2. Create Mega Menu
3. Customize Header Layout
4. View From Webstore (From Customer’s Perspective)
1. Introduction
A Mega Menu is an expandable menu that displays navigation options and information clearly without forcing your customer to dig through a maze of inner pages. Mega Menu provides enough space for images and other rich content to improve your webstore navigability and content.
2. Create Mega Menu
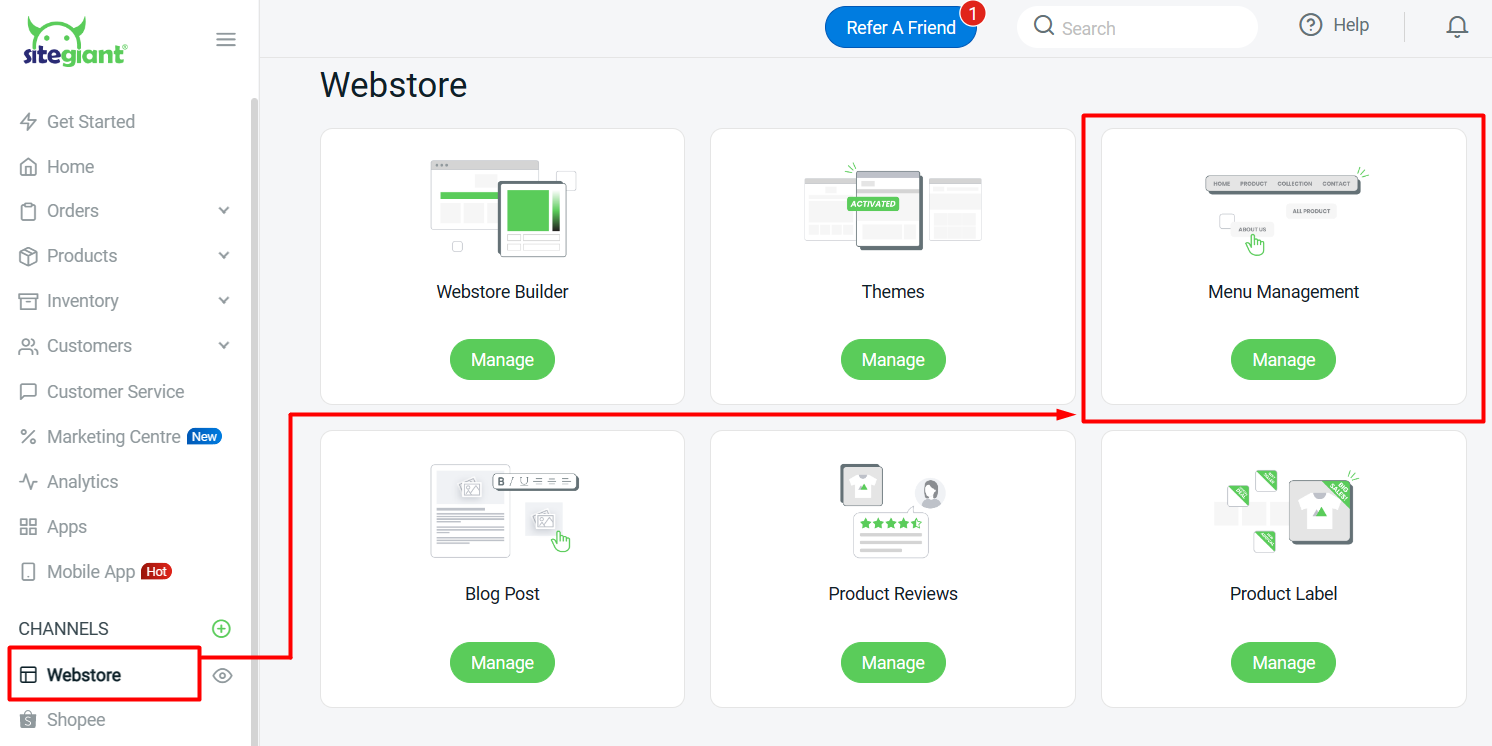
Step 1: Go to Webstore > Menu Management.
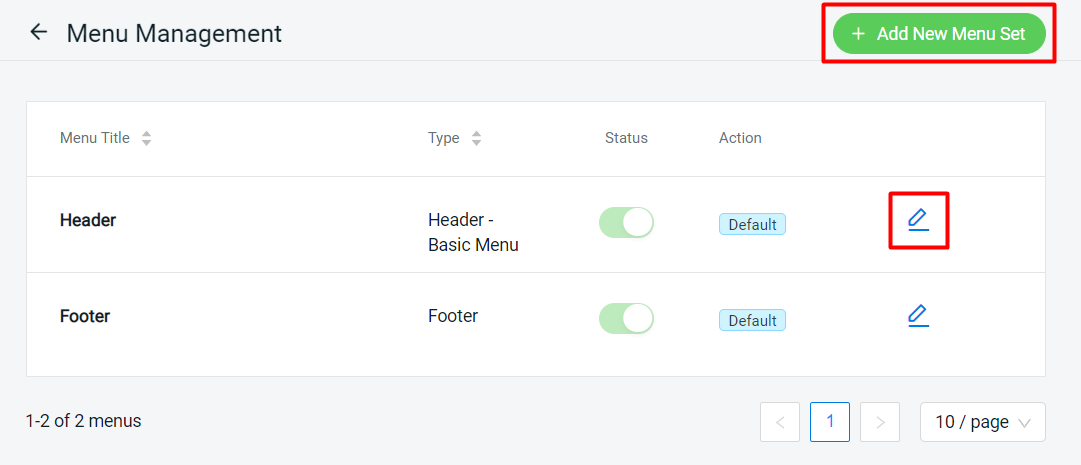
Step 2: You can choose to Add New Menu Set to create a new menu or click on the edit icon of the default Header to edit.
Step 3: Set the title for the menu and select Mega Menu for Header.

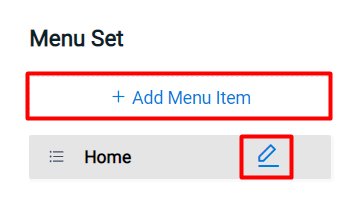
Step 4: Click on + Add Menu Item to create a new menu or click the edit icon to edit the existing menu.
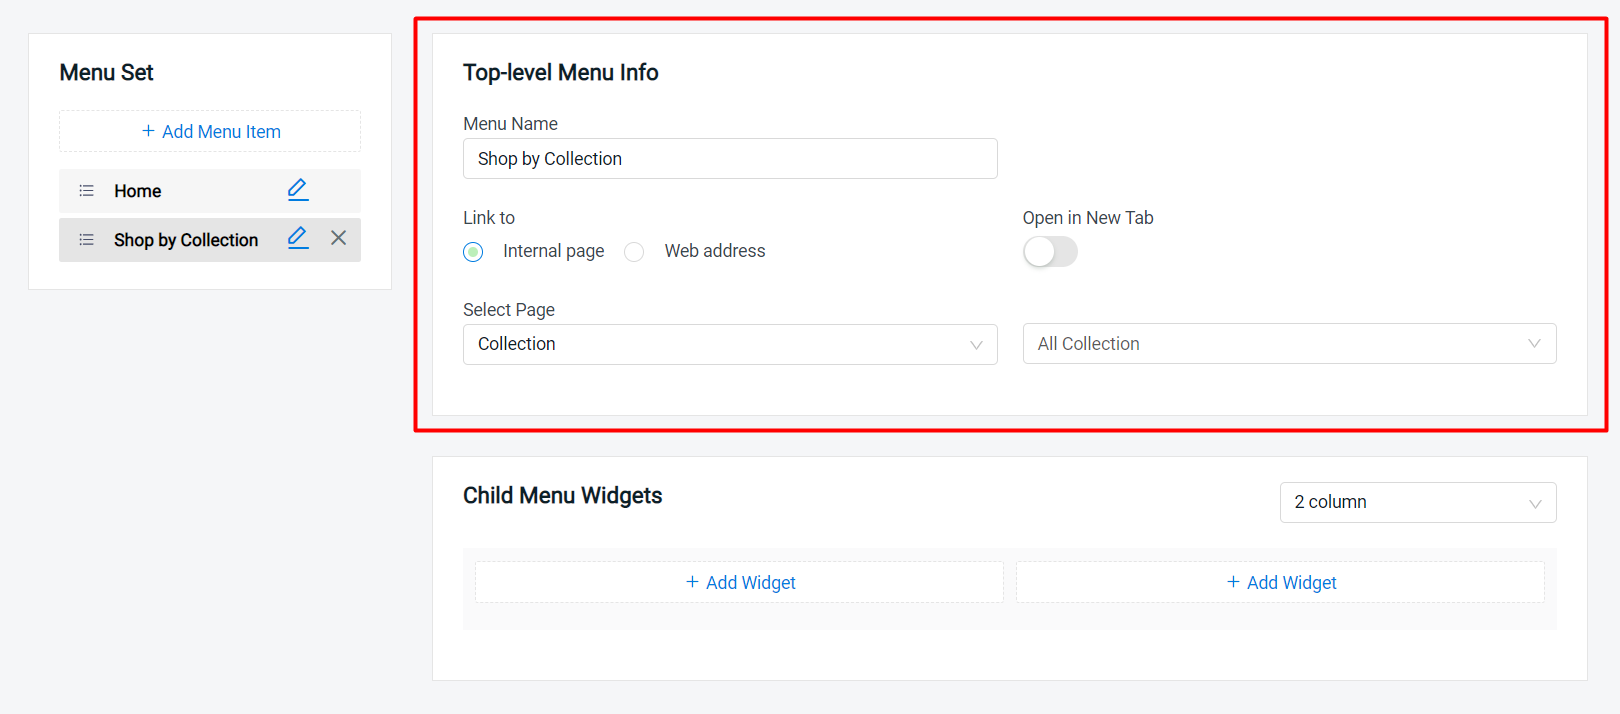
Step 5: Insert the Menu Name > choose to link with an Internal page or Web address > select page > enable Open in New Tab if you want a new tab to open after clicking the menu.
Step 6: Choose the column for the Child Menu Widgets > click on + Add Widget.
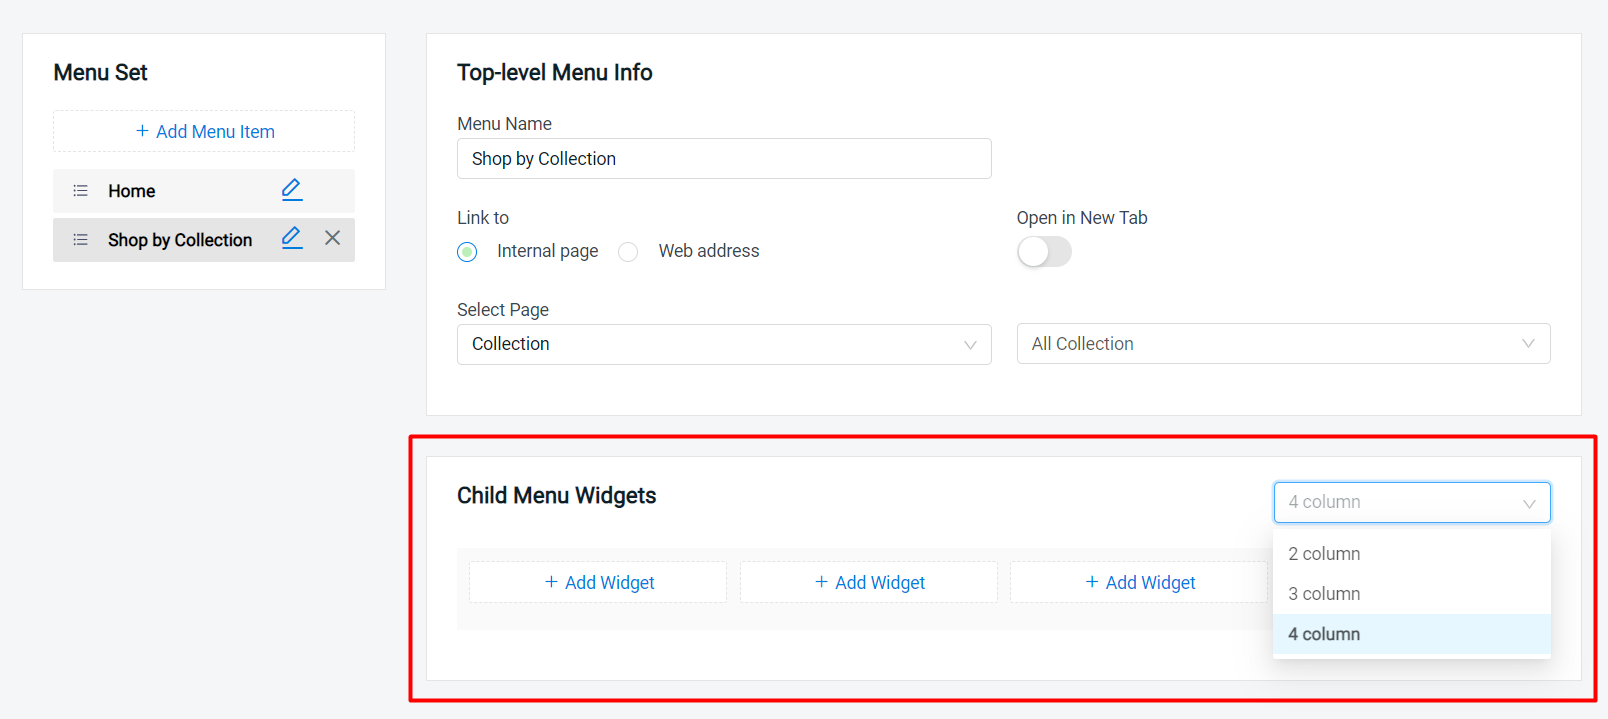
Step 7: You can add Image/ Page link/ Text input for the widget > Next.
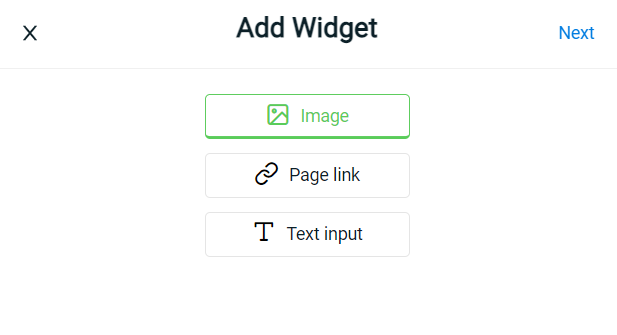
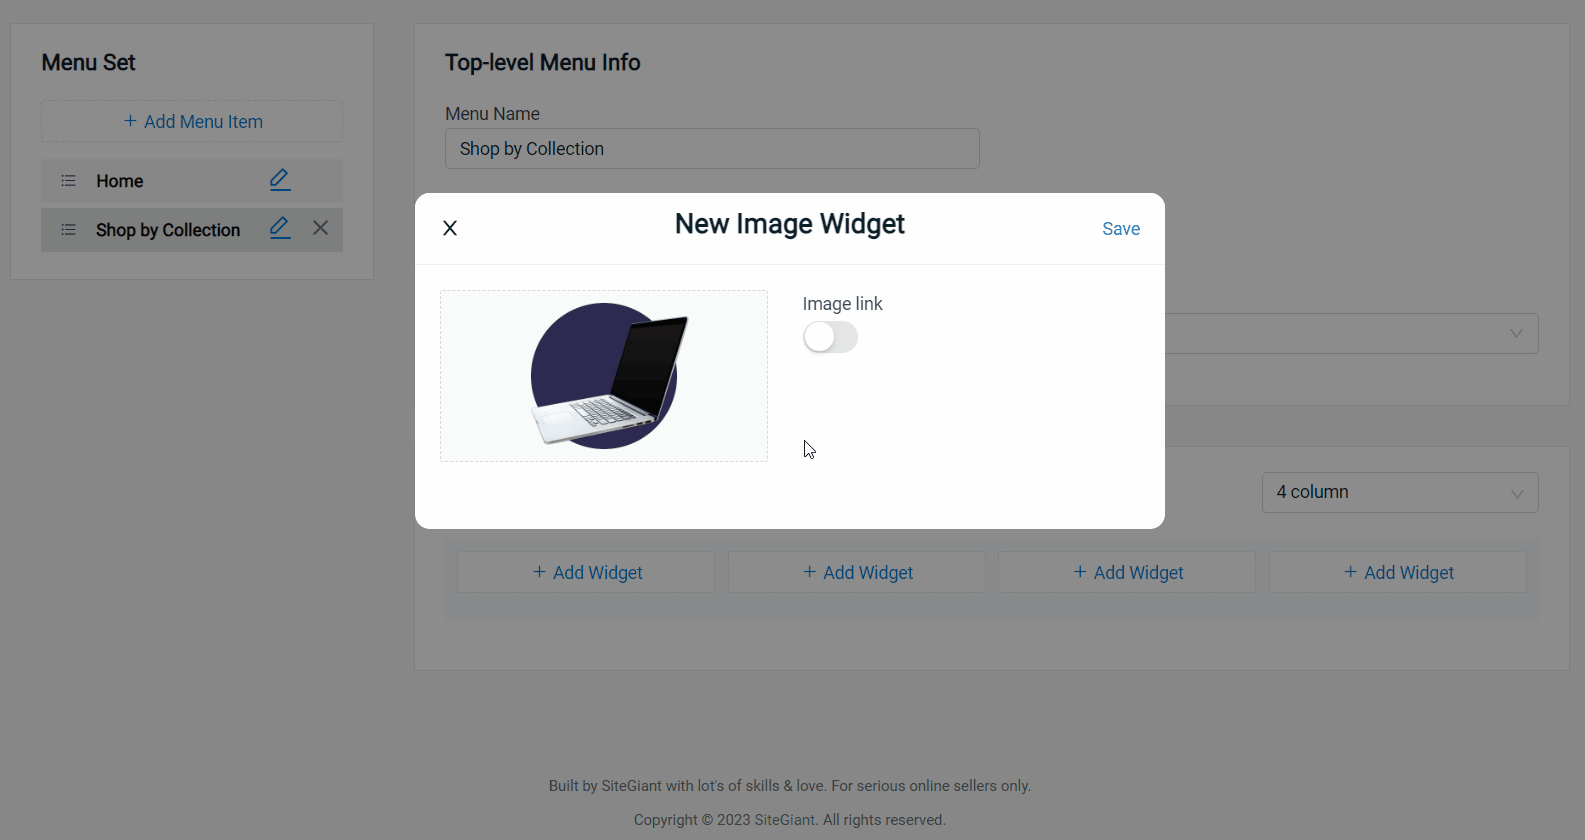
Image
Upload the image > if enabled image link, choose to link with the Internal page or Web address > select page > may enable Open in New Tab if you want a new tab to open after clicking the image.
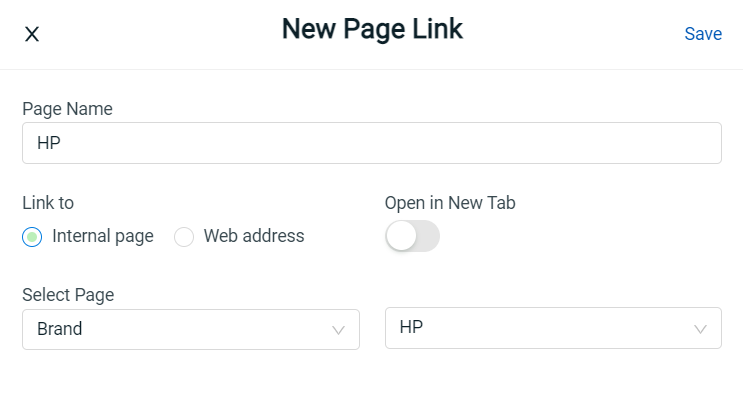
Page link
Insert the Page Name > choose to link with an Internal page or Web address > select page > enable Open in New Tab if you want a new tab to open after clicking the menu.
Text input
Fill in the Heading Text and Body Text > Save.

Step 8: Once done, click on the Save button on the top right to save changes.
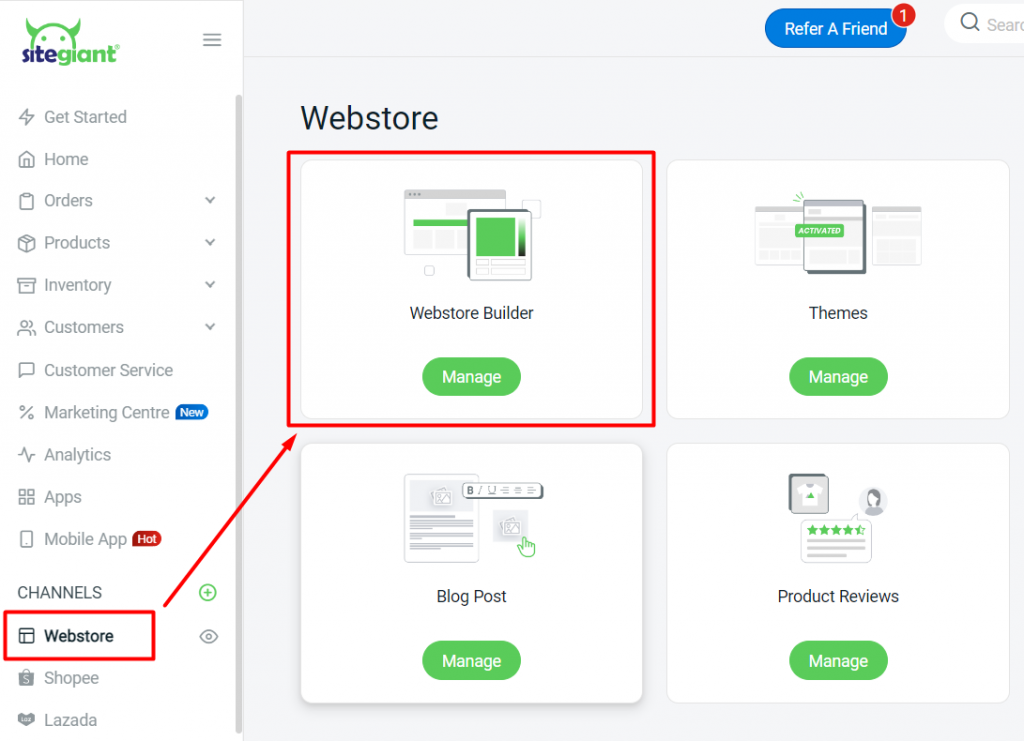
3. Customize Header Layout
Step 1: Go to Webstore > Webstore Builder.
Step 2: Navigate to Settings > Header > set the Menu Set to the Mega Menu > customize the layout, menu colour, text colour and the icon settings.
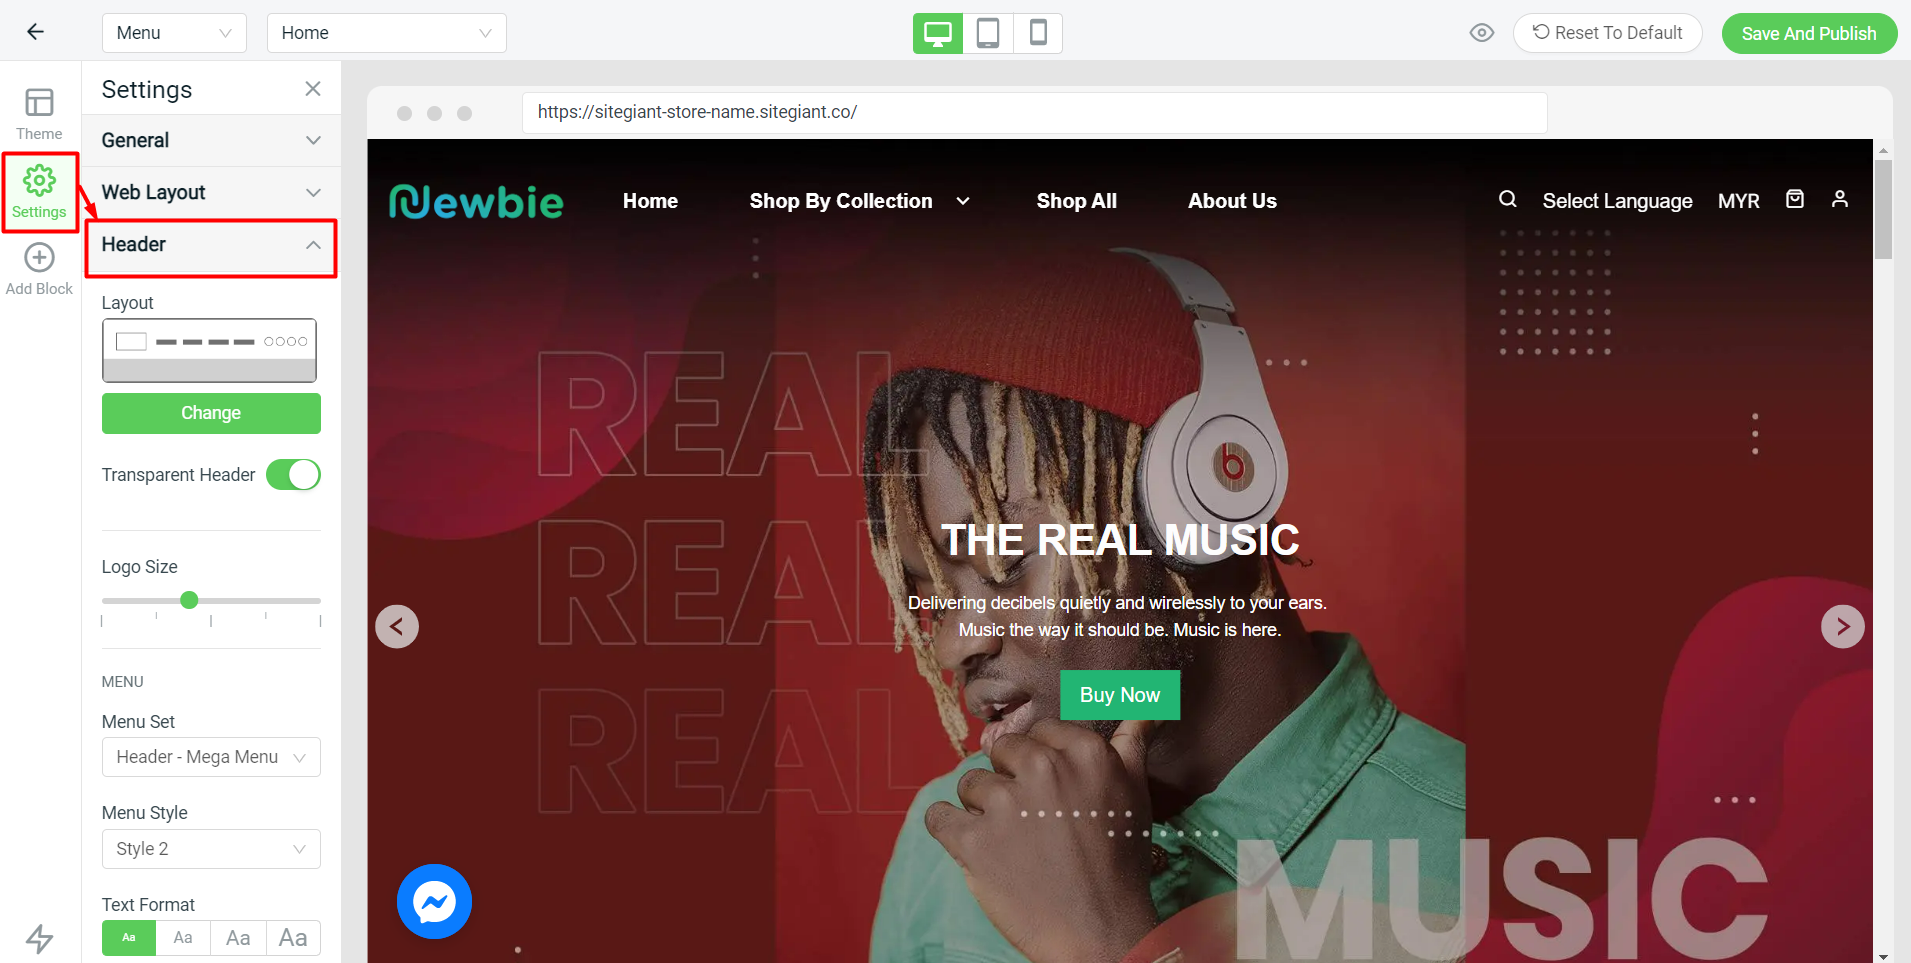
Step 3: Click on Save And Publish once done.
4. View From Webstore (From Customer’s Perspective)