1. Introduction
2. Create New Inventory Item
1. Introduction
When creating a new webstore listing, you must have the inventory items ready before you can start creating your products. But sometimes you might miss out to create the inventory item first. No worries! You are able to create the inventory items in the product listing.
2. Create New Inventory Item
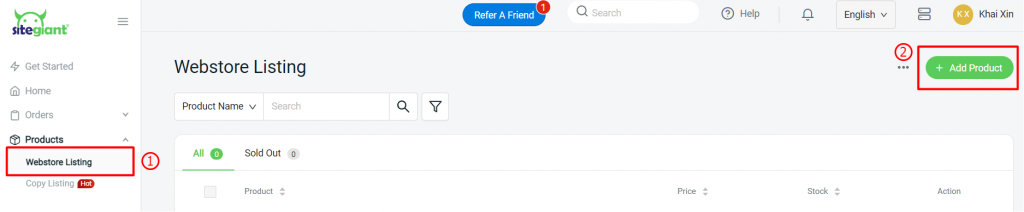
Step 1: Navigate to Products > Webstore Listing > + Add Product
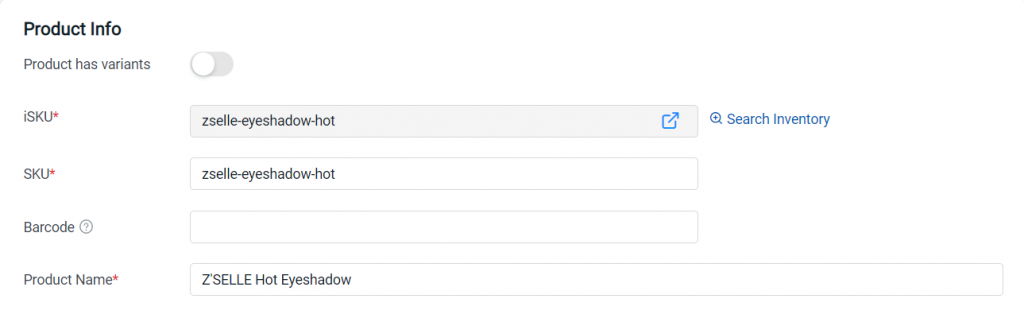
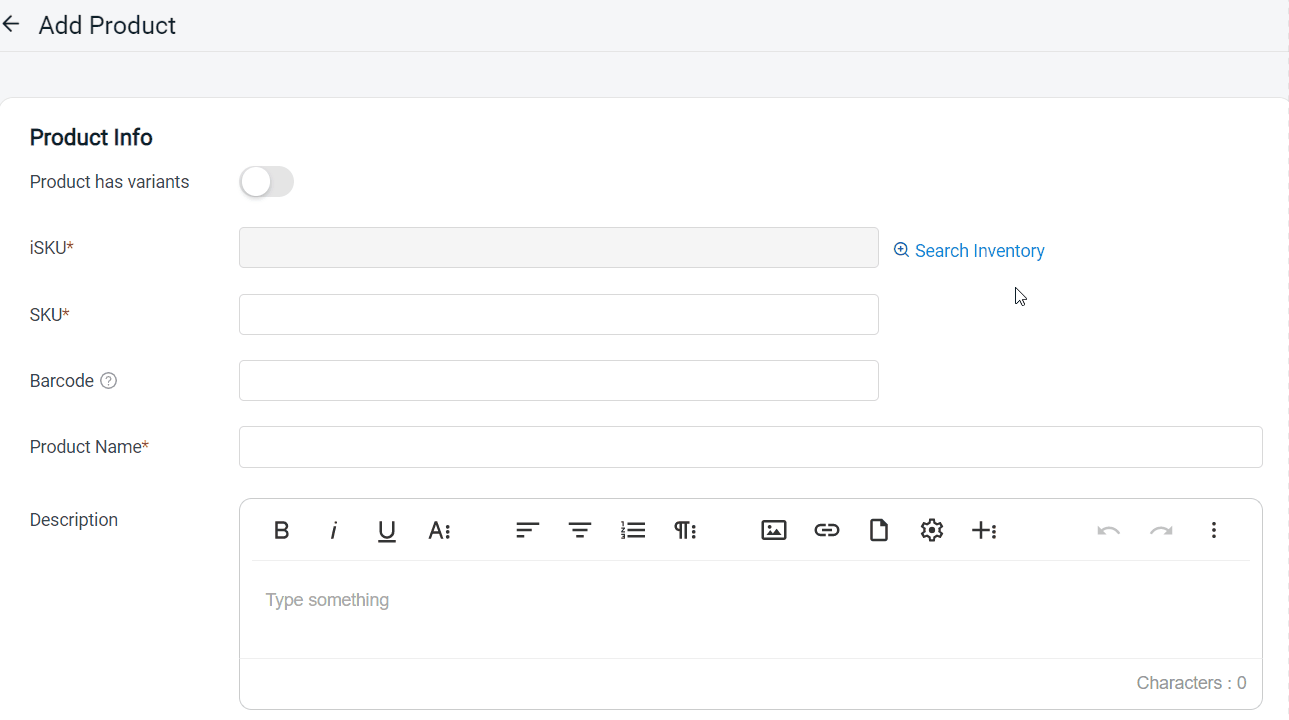
Step 2: For products without variants, click on Search Inventory from iSKU > Add Item
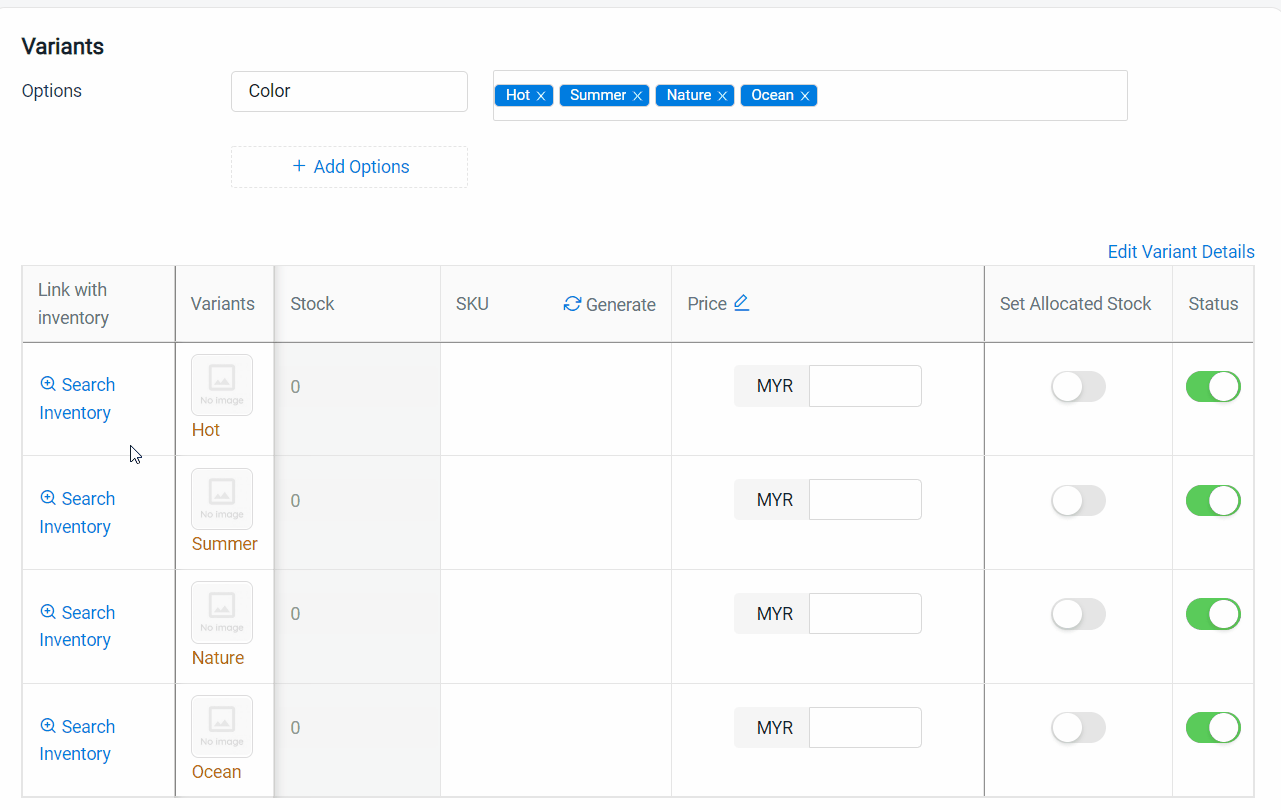
Step 3: For products with variants, click on Search Inventory from the link with inventory tab > Add Item
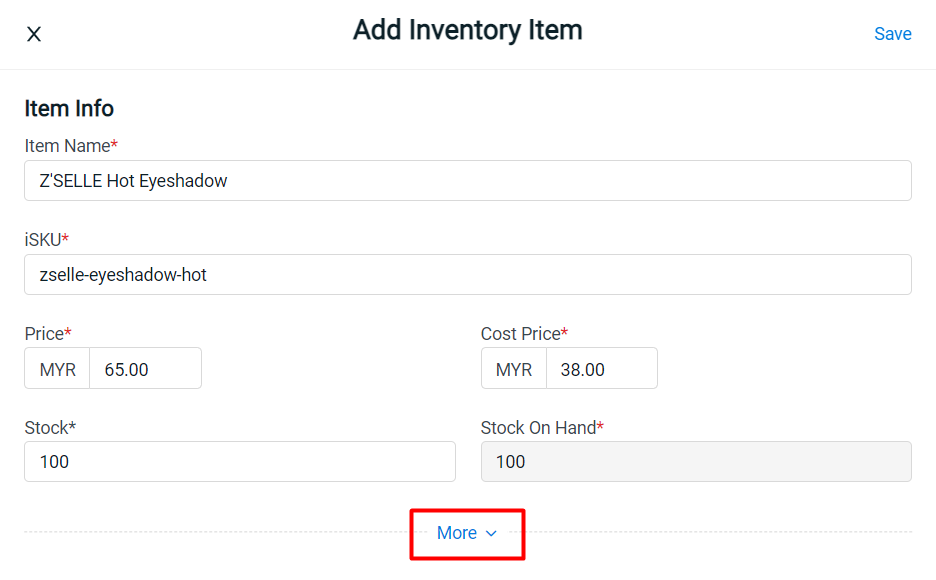
Step 4: Fill in inventory item info such as Item Name, iSKU, Price, Cost Price, and Stock > click on More to fill in more details
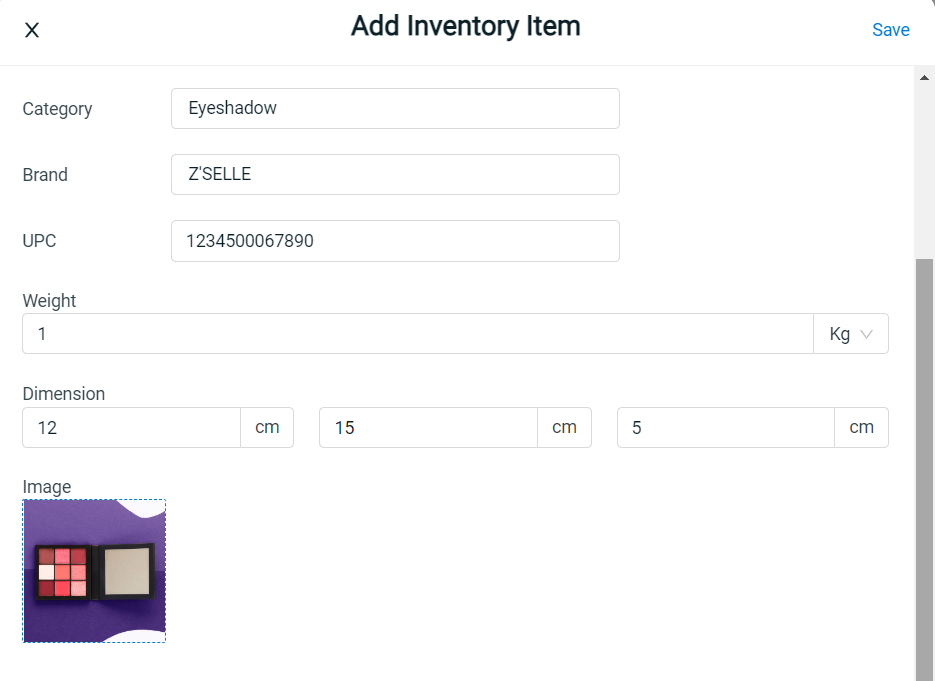
Step 5: Fill in the Category, Brand, UPC (Optional), Weight, Dimension and upload the image
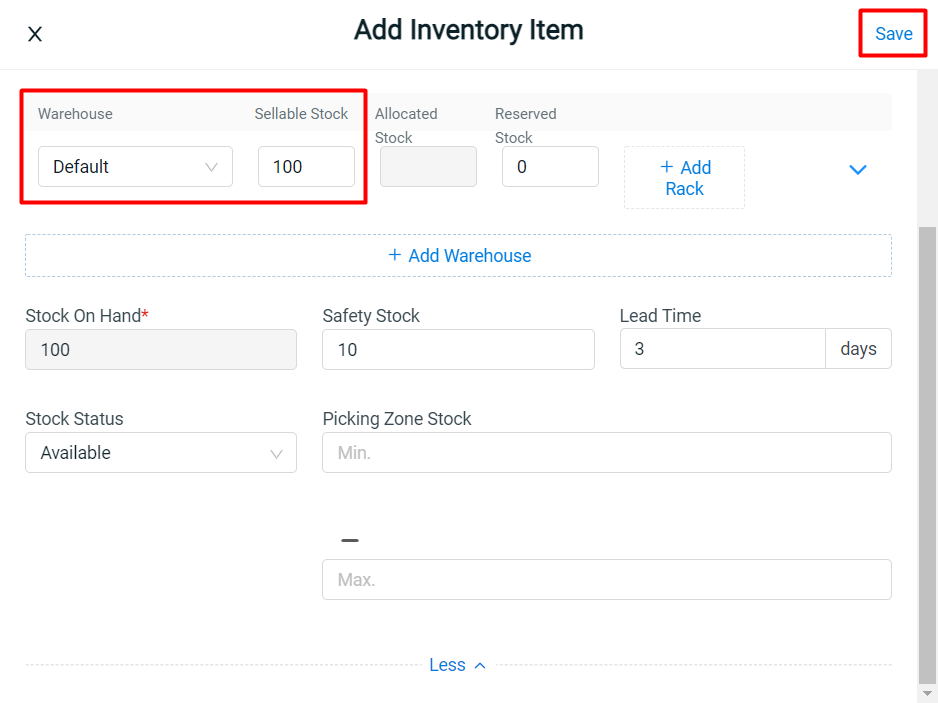
Step 6: Select the Warehouse and fill in Sellable Stock > click + Add Rack if you wish to assign the item to the rack > fill in safety stock and lead time for inventory forecasting (Optional) > Save
Step 7: The inventory item will be added to the product listing > some product details such as Product Name, SKU, Price, Weight, and Dimension will be auto-filled based on the inventory item created